Browse help topics
Invoices, credit notes and corrections
The invoiced ledger, plus how to credit a line or correct a rejected claim.
Last updated · 3 July 2026
Once you generate a batch, its rows move off Billing and onto the Invoices ledger. This is where you review what was invoiced and, if something needs to be reversed, issue a credit note or correct a rejected NDIA claim.
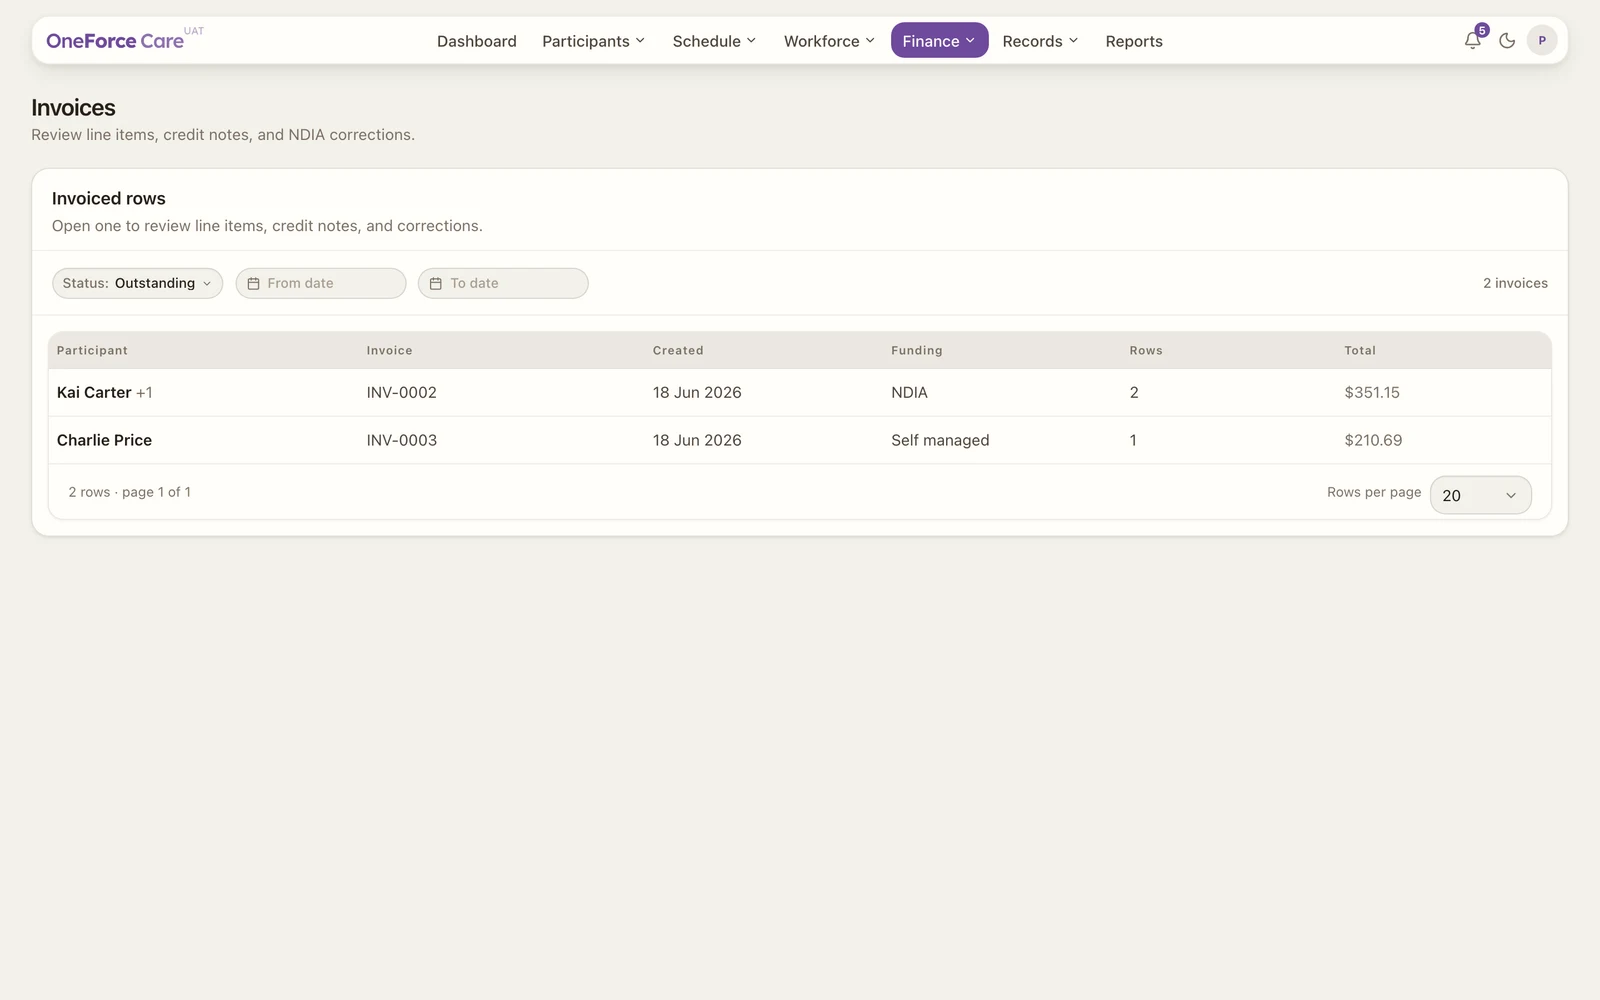
Open it from Finance ›Invoices . The page title is Invoices and the subtitle reads “Review line items, credit notes, and NDIA corrections.”
 1 2 3
1 2 3 The invoiced rows table
Each row is one invoice batch. The columns are Participant (the first, plus “+N” when a batch covers several), Invoice (the invoice number), Created, Funding (NDIA, Plan managed or Self managed), Rows (the line count, which appends the rejected count in red when an NDIA claim has rejections), and Total.
The Status filter defaults to Outstanding, because paid and void invoices need no further action. Switch it to Paid, Void or All, and use the From date and To date pickers to filter on the created date.
Open an invoice
Select a row to open the breakdown drawer, titled Invoice followed by its number. It lists every line, and what you can do depends on the line:
- Credit a line (plan-managed and self-managed). Creditable lines have a checkbox. Tick the lines to reverse, choose whether to re-bill them with the Re-bill credited lines toggle, then select Issue credit notes at the bottom (the button shows how many lines you ticked, for example “Issue 2 credit notes”). A credit note reverses the charge; choosing Yes to re-bill also adds an editable copy of each line back to Needs reconfirmation, ready to fix and invoice again. On success you see “N credit note(s) created with re-bill rows.” or “N credit note(s) created and added to the next batch.” depending on your choice.
- Correct a rejected or short-paid NDIA claim. A rejected NDIA line shows its claim error in red. A line paid less than claimed shows “Paid $X of $Y” underneath in amber; if that shortfall was simply the NDIS price limit capping the claim, it also reads “capped at the NDIS price limit” and cannot be corrected (a correction would just be capped again). Any other rejected or short-paid line offers a wrench button, Create correction. Selecting it closes the drawer, makes a pre-filled copy of the line, and opens it in the edit drawer so you can adjust the values. On success creating the row you see “Correction row created. Review and adjust values before batching.”; save your edits with Save changes.
Both credit notes and corrections come back through the Billing register as new rows, ready to batch again. A line that cannot be actioned shows why instead: “Credit note”, “NDIA managed”, “Correction pending”, “Credit note pending”, or “Capped at price limit”.
Note
NDIA-managed rows cannot be credited. Use a correction row instead, which is why the credit checkbox is only on plan-managed and self-managed lines.
Downloads
There is no download button on this page. The NDIS claim CSV downloads automatically when you generate an NDIA batch, and you can re-download any batch artifact (the NDIS CSV or a plan or self-managed PDF invoice) from the Payments page.
Tip
Not seeing a batch yet? You generate batches from Billing first. See Generate invoice batches.