Browse help topics
Assign a worker
Open a shift, manage assignments, pick a worker and support code, then publish.
Last updated · 3 July 2026
A new shift has no worker. To roster one, open the shift and work through its assignments. The NDIS support code is chosen here, per worker, not on the create form.
Open the shift and manage assignments
Select the shift on the Planner or Table to open the Edit Shift drawer. Its Status and assignments section shows the shift’s current status pill on the left and a Manage assignments button on the right.
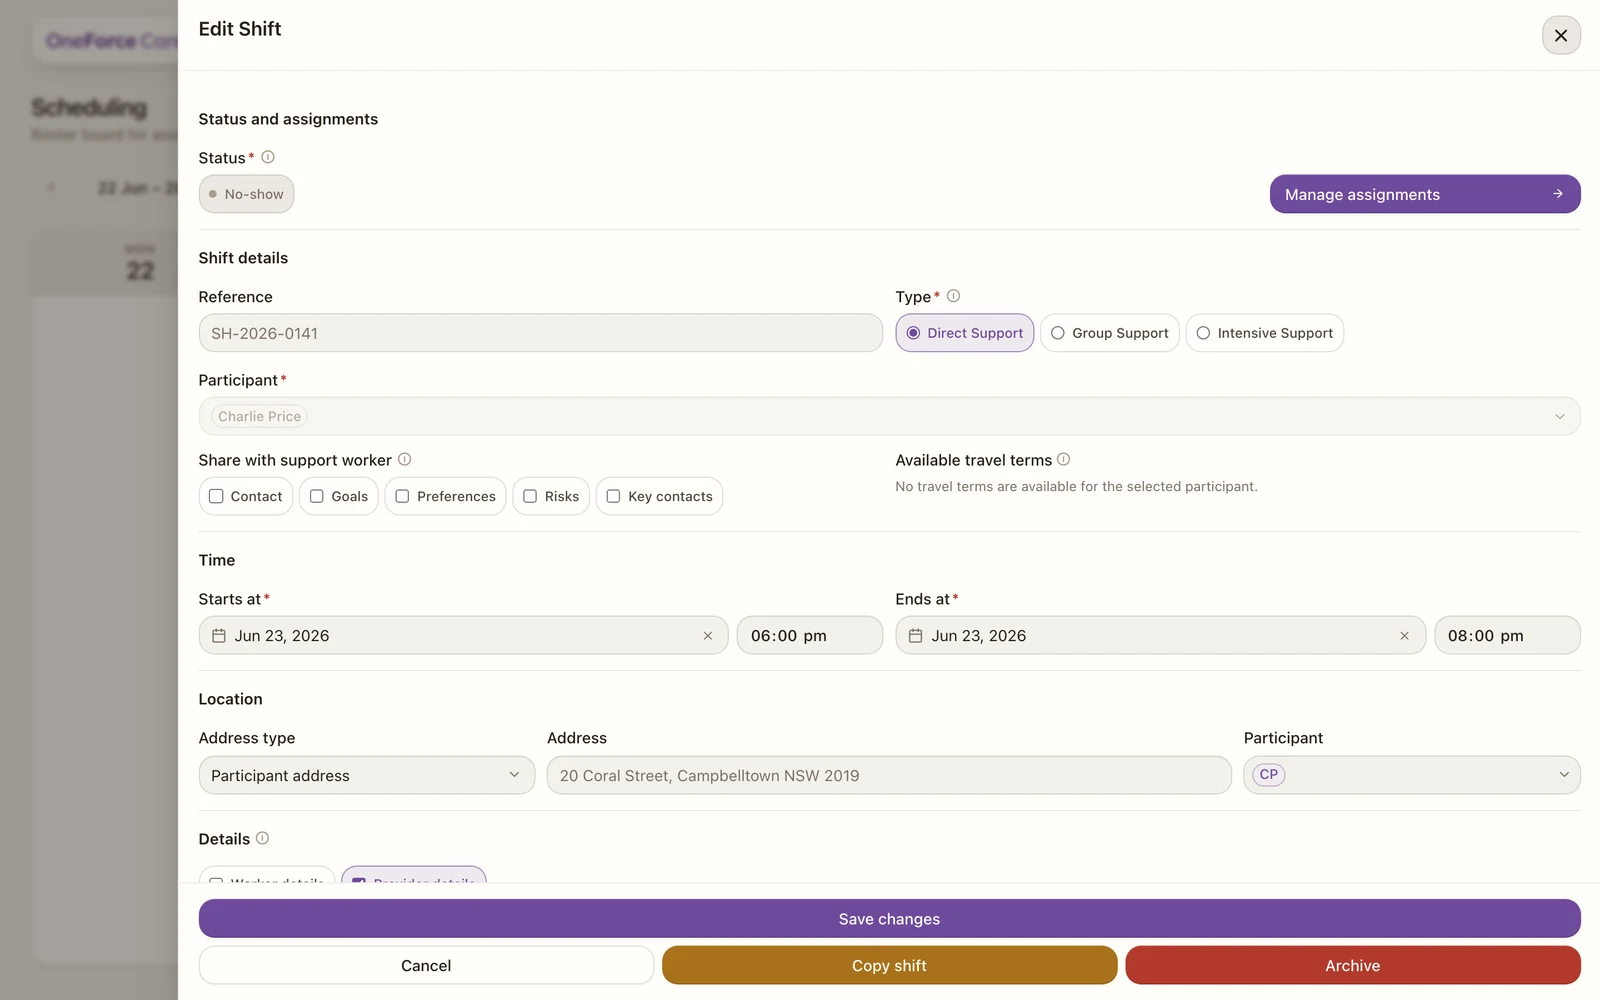 1 2
1 2 Add a worker
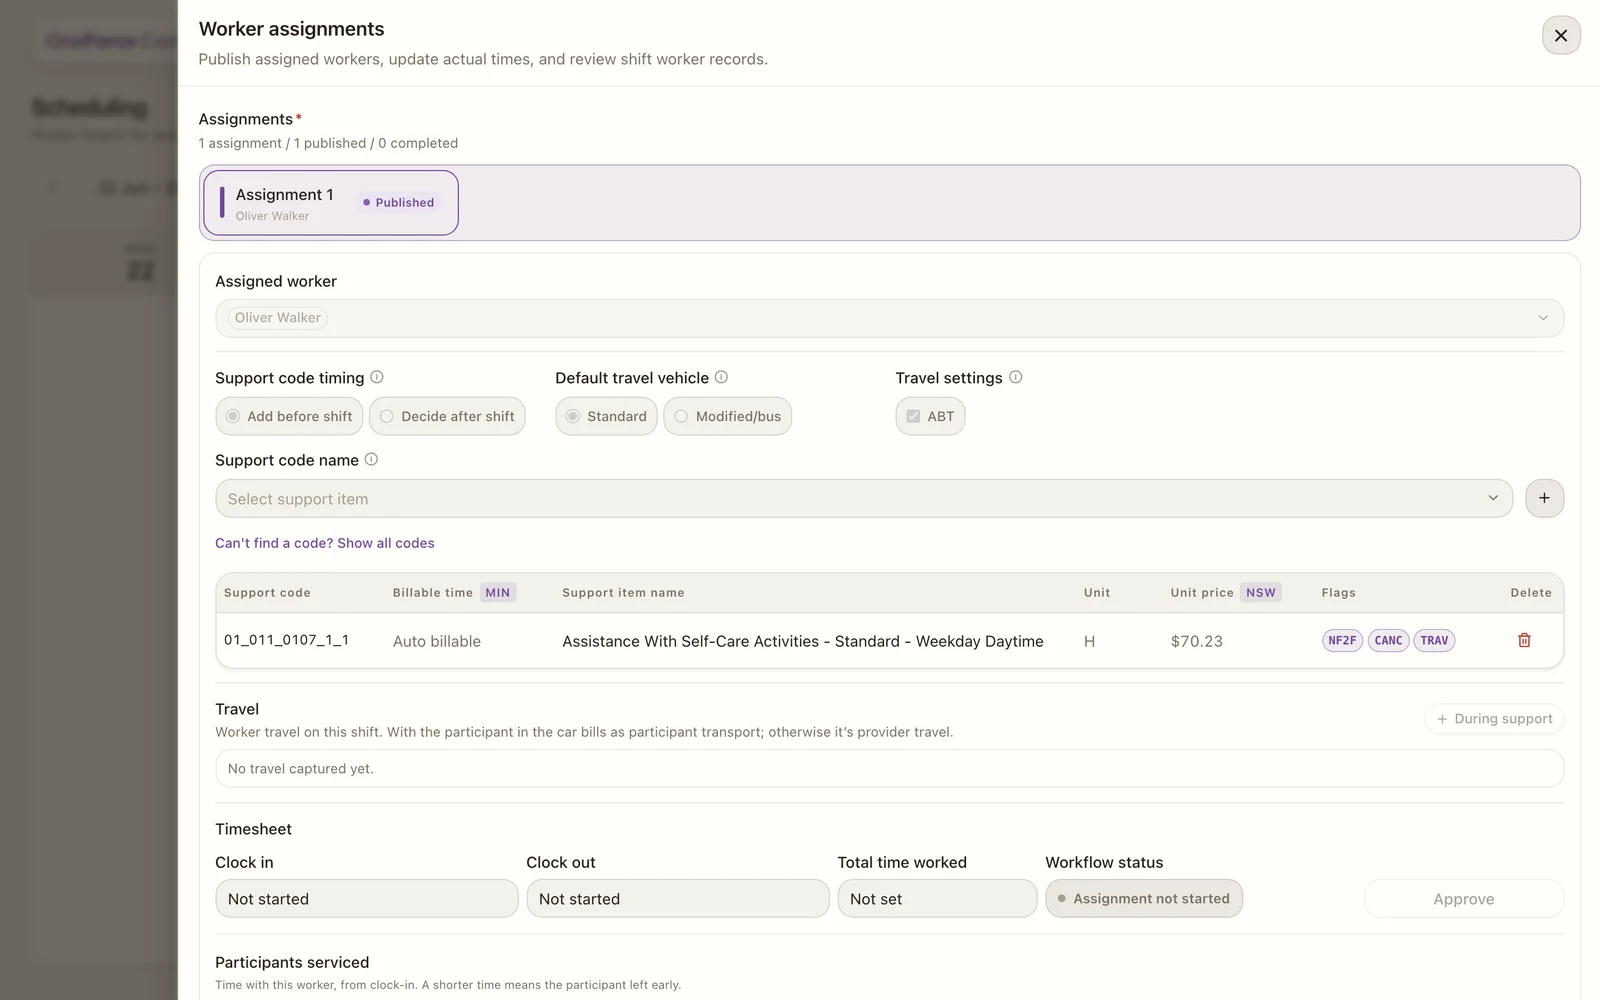
The Worker assignments drawer opens, with an Assignments summary (“N assignments / N published / N completed”) at the top.
 1 2 3
1 2 3 How you add workers depends on the shift’s type:
- Direct Support has a single assignment. Pick the worker under Assigned worker.
- Group Support starts with one assignment. Select Add assignment to add another (only enabled while participants remain unallocated), then pick a worker for each and use Participants for this assignment to attach the participants that worker looks after. Each tab reads “N participants attached · N remaining · 1:N finance split”. Every assignment lands on its own tab, labelled Assignment 1, Assignment 2 and so on, showing the worker’s name and a status badge; a tab can be removed with its × unless it is the first assignment, published, or already started.
- Intensive Support has no per-assignment worker picker. Use the Assigned workers multi-select at the top instead: adding a worker there creates an assignment for them, and removing one deletes it (unpublish first if it is published). Every worker serves the shift’s one participant.
Set the support code timing and codes
Support code timing sets whether you add the code now (Add before shift) or confirm it after delivery (Decide after shift, which opens the picker once the worker submits progress notes). It locks once the assignment is published or work starts.
Under Support code name, search for the support item and select the + button to add it to the assignment; it appears in a table below with its quantity. Add more than one code if the assignment bills more than one support item. If you cannot find a code, select Can’t find a code? Show all codes to widen the list beyond the recommended set.
Note
Publishing checks that every assignment has a worker and at least one support item (for group support, that every participant is allocated to an assignment), and that the worker is available for the shift’s time. A toast tells you exactly what is missing.
Publish the assignment
Select Publish to send the assignment to the worker. Only then does the shift appear in their mobile app, ready to clock in. The status moves to Published. To take it back, select Unpublish and confirm Unpublish assignment?, which removes it from the worker’s mobile schedule until it is published again.
Tip
After the worker has clocked in and out, come back to approve their times: Review and approve assignments.