Browse help topics
Service agreements
Link the plan, choose signing, add agreed supports, set claim terms and invoicing, then create or send the agreement.
Last updated · 3 July 2026
A service agreement records the supports you have agreed to deliver, the terms you can claim under, and (optionally) collects signatures. Open the participant, then select the Service Agreements tab.
You need a saved NDIS plan first
You can only build an agreement once the participant has a saved NDIS plan. Until a plan exists the tab shows Complete the NDIS plan first. The agreement links to the current plan automatically, so the Linked NDIS plan field is read-only; you do not pick the plan yourself.
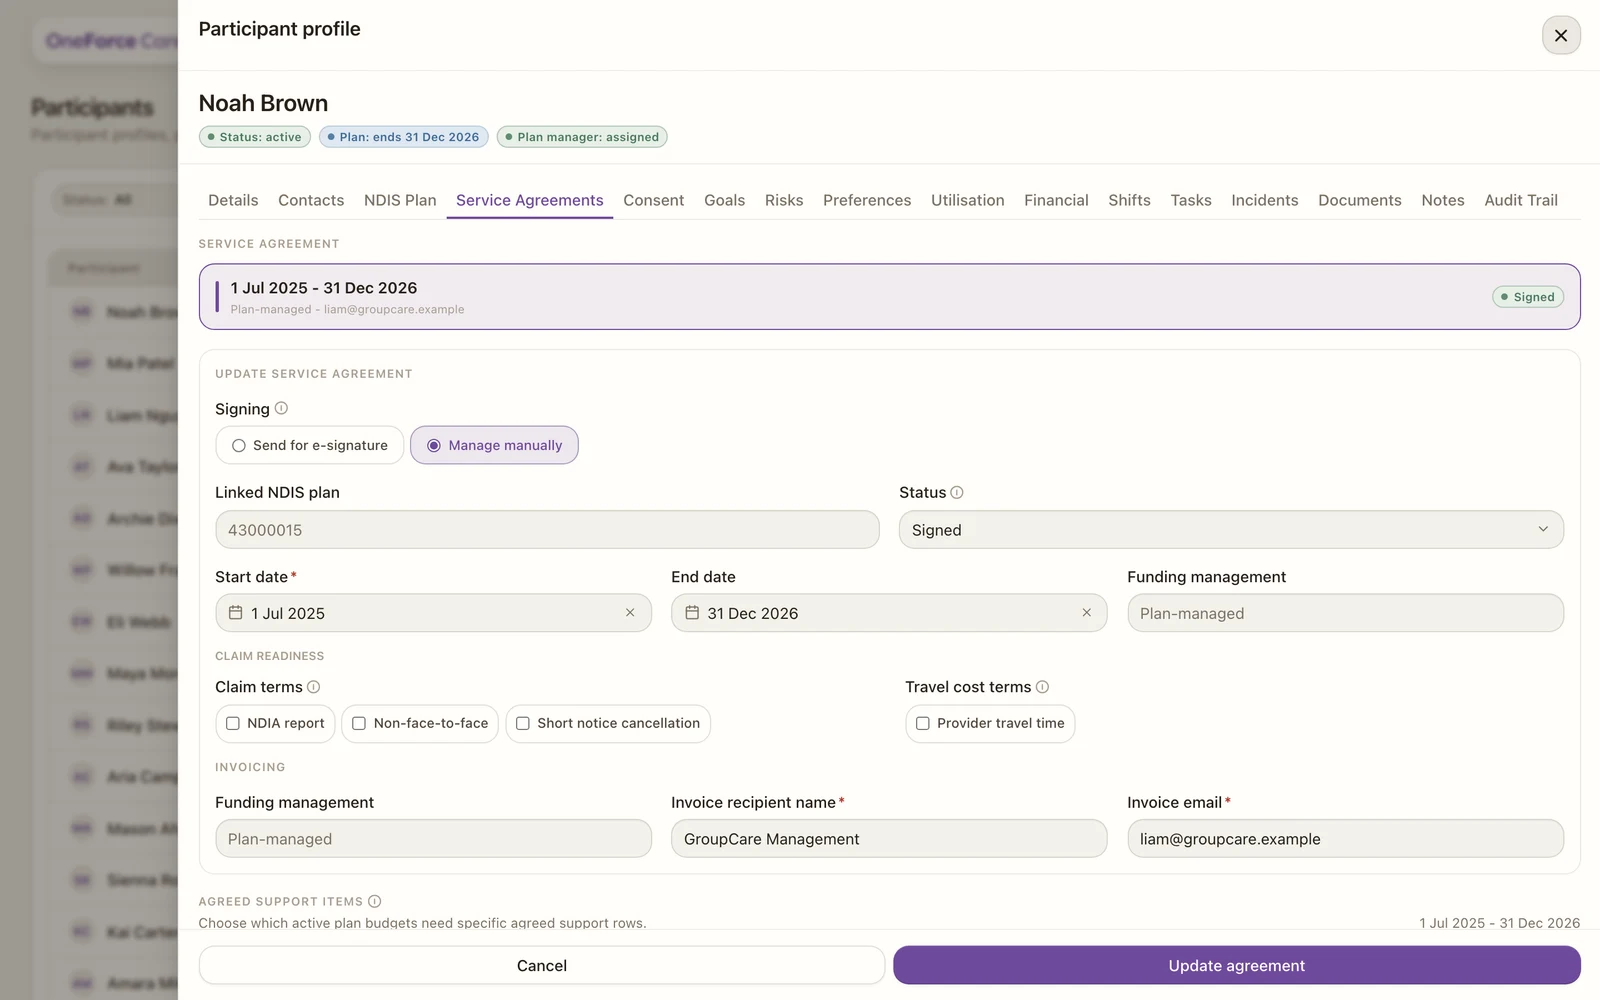
A saved agreement shows at the top of the tab with its status. The form below it is where you set the signing method, terms and invoicing, then update the agreement or create the next one.
 1 2 3 4
 Signing: e-signature or manual
- Send for e-signature: emails the agreement to the participant (or their representative) and your provider signatory, tracks the signatures, marks the agreement Signed automatically, and files a signed PDF. The status is managed for you.
- Manage manually: you handle signing yourself (on paper, for example), set the Status (Draft, Sent or Signed) by hand, and can upload a scan of the signed copy.
Start date is required; End date is optional. In e-signature mode the status updates on its own; in manual mode you set it.
Agreed support items (where Stated matters)
This section reads directly from the plan’s budget pools, and the Stated versus Flexible choice from the plan drives it. Enable it, choose which budgets to itemise, then add a support item per budget.
- Only the plan’s active budget pools appear here.
- A Stated pool needs its NDIS support codes added, or shifts that draw on it have nothing claimable.
- A Flexible pool is optional. Itemise it only if you want to lock in specific agreed rates.
Watch out
If a Stated budget has no agreed support codes, shifts that use it cannot be claimed. Add the codes here so delivery can flow through to an invoice.
Where a support item requires a quote, you also record the Quote reference, Approved date, Approved rate, Approved amount and a Quote document.
Claim terms
Claim-readiness toggles decide which clauses go into the agreement and what your team can claim, for example claiming time on NDIA reports, delivering supports by phone or video, short-notice cancellations, and provider travel time (capped by the plan’s MMM remoteness level).
Invoicing
Who you invoice depends on the plan’s funding type. For each funding style in use, a recipient name and a valid email are required:
- Plan-managed: one contact, the plan manager.
- Self-managed: one contact, the participant or their nominee.
- NDIA-managed: no invoice contact, since you claim from the NDIA directly.
- Mixed: one contact for each funding style across the active pools.
A plan manager you added under Contacts can be used as the recipient.
Create, update or send
- For a new agreement, select Create agreement. You will see Service agreement created.
- For an existing one, select Update agreement.
- In e-signature mode, select Send for signatures. The participant (or representative) and your provider signatory both need an email, or you will see Missing before sending: listing what is needed.