Browse help topics
Create a shift
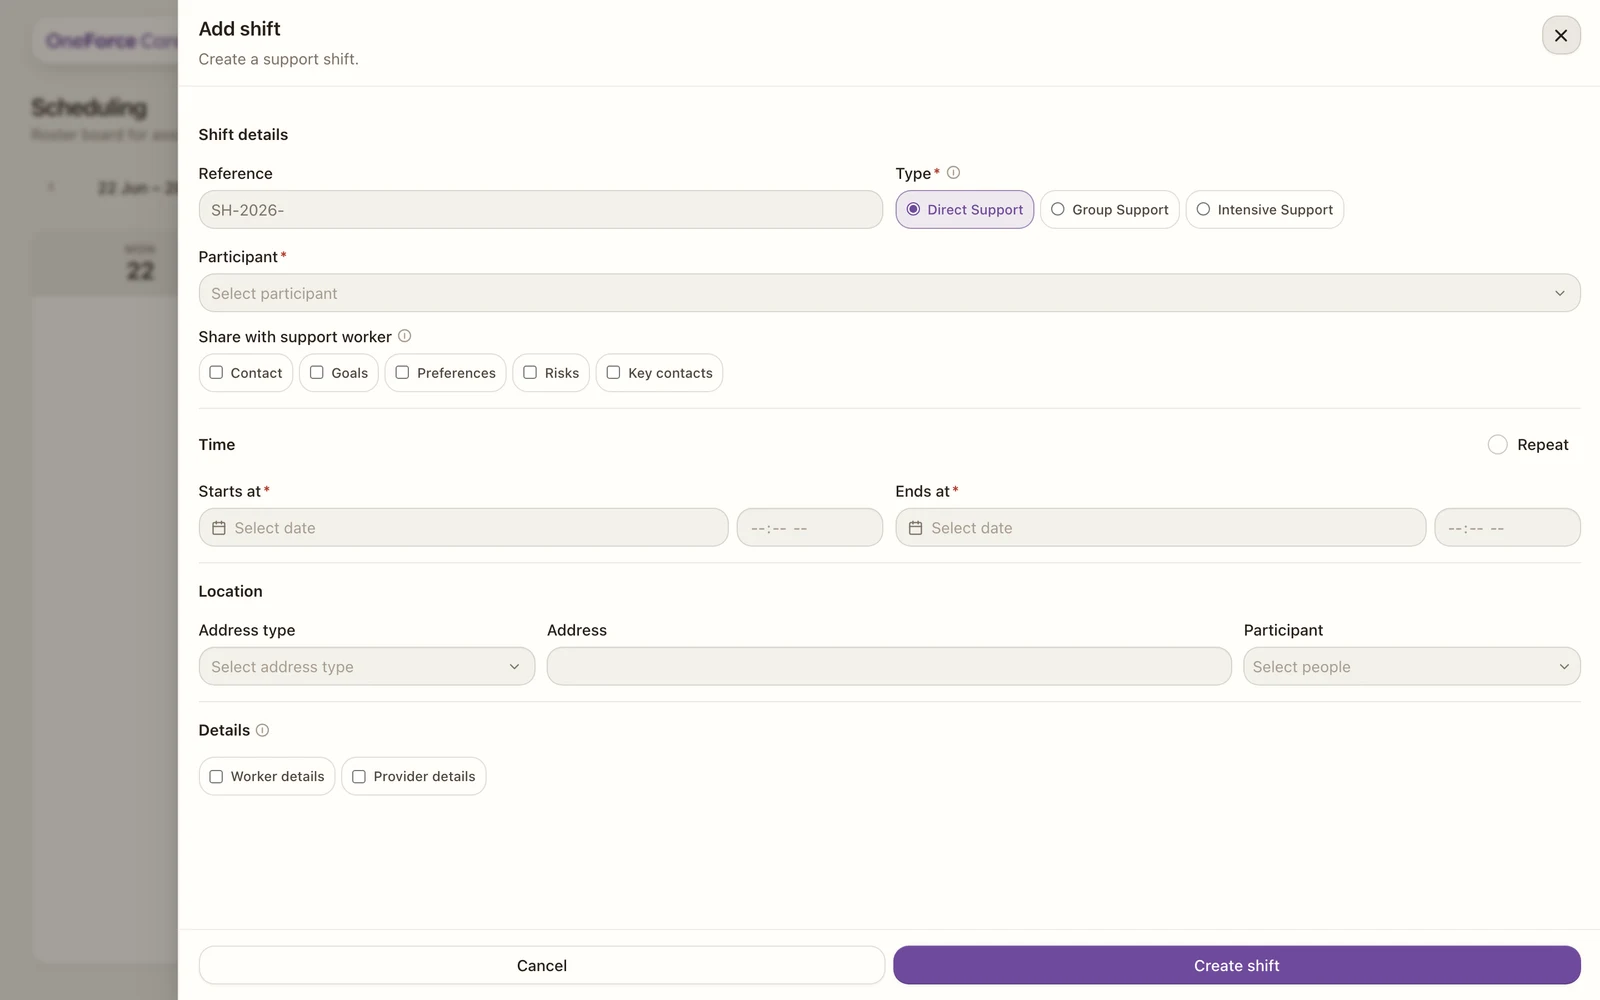
Fill the Add shift form and create an unassigned shift.
Last updated · 3 July 2026
A shift is one block of support: a type, a participant, a time and a place. You create it first, then assign the worker afterwards.
Note
A new shift is created unassigned. There is no worker picker and no NDIS support code on this form. You add the worker and choose the support code later in Assign a worker.
Open the create drawer
Go to Schedule ›Scheduling and select Add shift at the top right. The form opens in a side drawer titled Add shift.
 1 2 3 4
 Complete the form
Fields marked with a red asterisk are required.
Shift details
| Field | Required | Notes |
|---|---|---|
| Reference | Auto | Read-only. Shows the prefix until you save, then becomes SH-YYYY-NNNN. |
| Type | Yes | Direct Support, Group Support or Intensive Support. Defaults to Direct Support. See Shift types. |
| Participant | Yes | One participant for Direct or Intensive; several for Group. |
| Share with support worker | No | Care-plan sections the worker can see on mobile: Contact, Goals, Preferences, Risks, Key contacts. |
| Available travel terms | Auto | Read-only badges drawn from the participant agreement. See Travel on a shift. |
Time
| Field | Required | Notes |
|---|---|---|
| Starts at | Yes | Date and time, in 15-minute steps. Must be in the future. |
| Ends at | Yes | Must be after the start. |
| Repeat | No | Tick to make the shift recurring. See Recurring shifts and copying. |
| Program of support | No | Tick when this shift is part of an NDIS program of support. It changes cancellation billing: see Cancel a shift. |
Location
For Direct or Intensive Support, the Location section is one row:
| Field | Required | Notes |
|---|---|---|
| Address type | Yes | Participant address or Other address. |
| Address | Yes | Mirrors the participant address, or search for another. |
For Group Support, the Location section instead lists a pickup row per address: Address type, Address, and which of the selected participants are picked up there. It opens with one blank Other address row. Select Add another location for more pickup points (greyed out once every participant has one), and use the remove button to drop a row. Below the pickup rows sits a fixed Destination row: a Yes/No toggle for whether the shift has a drop-off address, on by default, with the address editable when it is Yes.
Details
| Field | Required | Notes |
|---|---|---|
| Notes for worker | No | Shown to the assigned worker. Tick the toggle to add them. |
| Internal notes | No | Provider-only. Tick the toggle to add them. |
Create the shift
Select Create shift at the bottom of the drawer. The shift is saved unassigned and appears on the roster with the status Booked.
Tip
Group support has an extra rule: every participant on the shift must share the same pricing region, checked as you select them. Next, assign a worker.