Browse help topics
Report an incident
Create an incident and capture every detail the form asks for.
Last updated · 3 July 2026
Record an incident as soon as you can after it happens. The form captures who was involved, what occurred, what you did in response, and any evidence. The same drawer is used to create and to edit, so you can come back and add more later.
Open the form
Go to Participants ›Incidents and select Create incident at the top right. The form opens in a side drawer, titled Create incident.
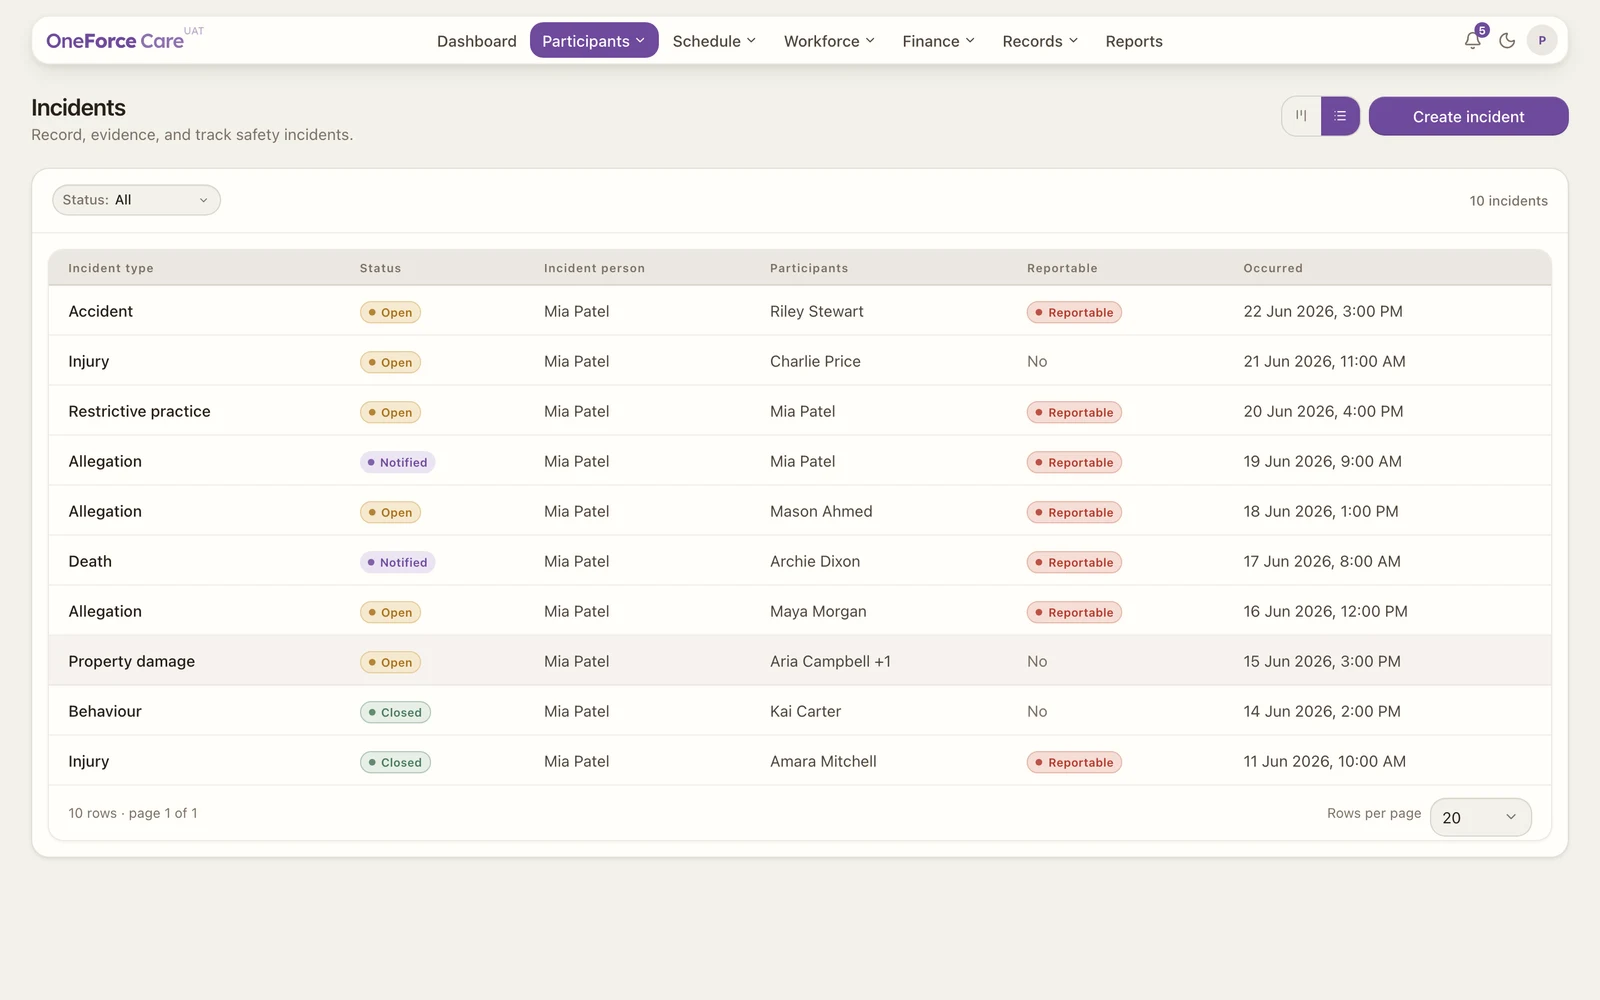 1
1 Note
If you do not see Create incident, you do not have the incidents create permission. Ask your admin to grant it under Account ›Organisation . See Roles and permissions.
Complete the incident details
Every field with a red asterisk is required.
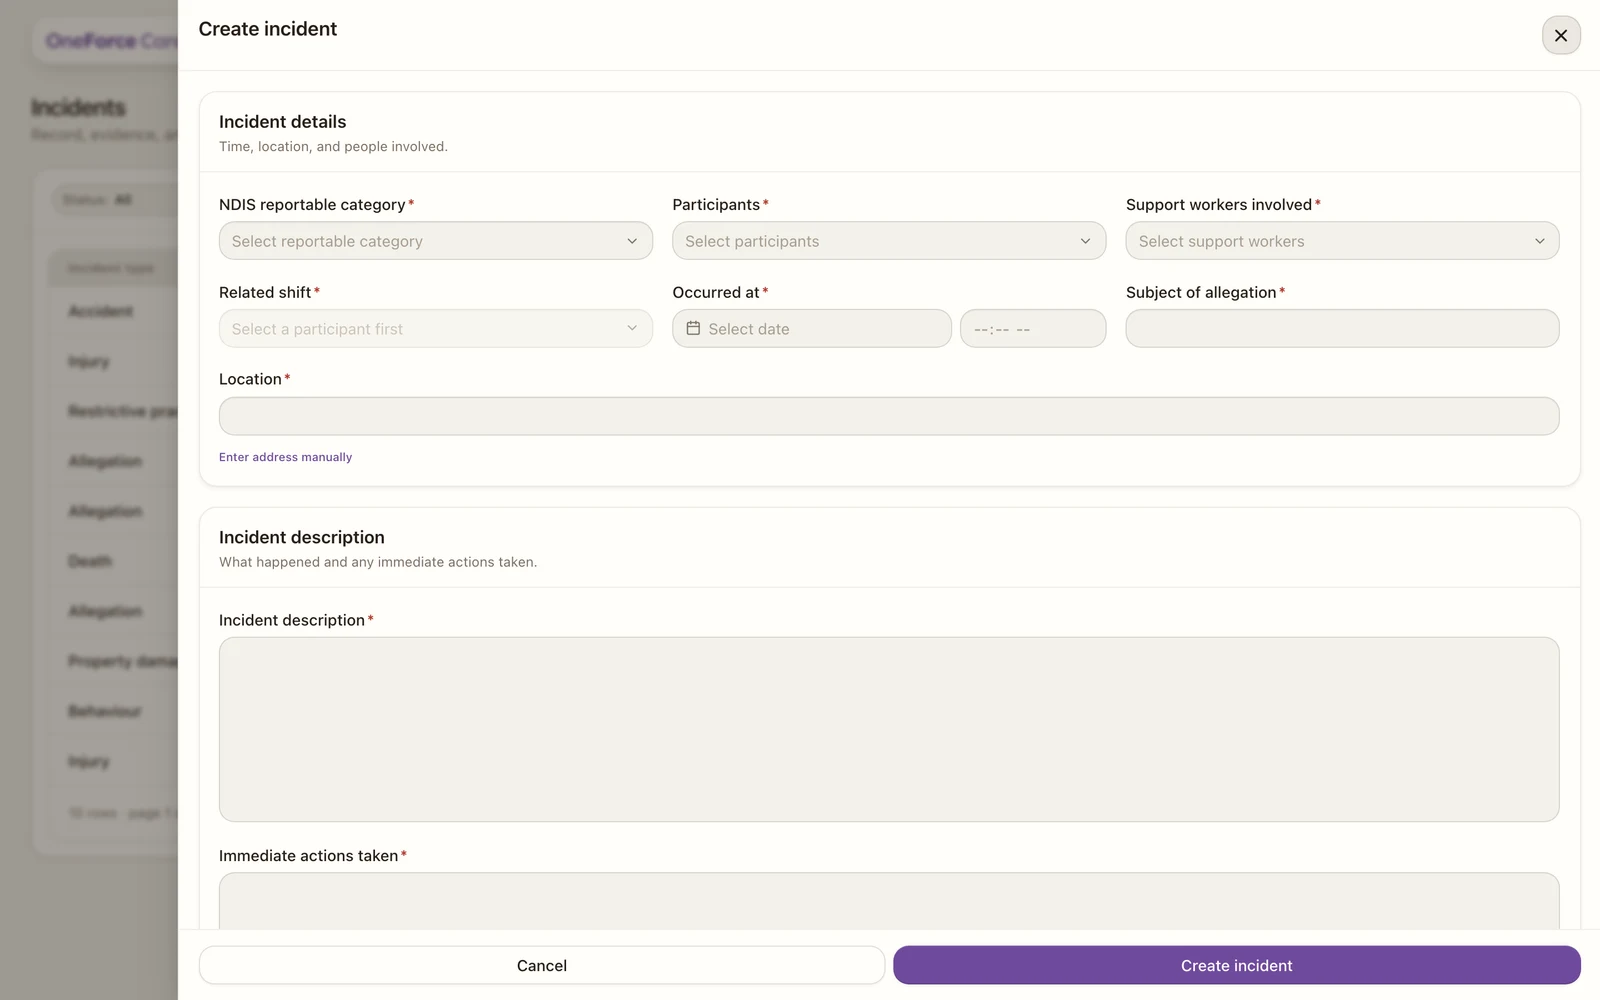 1 2 3
1 2 3 Incident details
| Field | Required | Notes |
|---|---|---|
| Incident type | Yes | The operational kind of incident: Fall, Medication error, Behaviour of concern, Near miss, Property damage, Absconding / missing or Other. This is separate from the NDIS reportable category below. |
| NDIS reportable category | Yes | Choose the category. If it is reportable, the form shows the deadline to notify the Commission. Choose Not a reportable incident if it is not one. See Reportable incidents. |
| Participants | Yes | The participant or participants involved. |
| Support workers involved | Yes | The worker or workers who were on. |
| Related shift | Yes, when there is one | Locked to Select a participant first until you pick a participant. Once you do, it lists that participant’s shifts by date and time (with a reference if the shift has one). If none exist it shows No shifts for this participant and you can leave it; the form does not block saving in that case. |
| Occurred at | Yes | The date and time it happened, in 15-minute steps. Clearable. |
| Subject of allegation | Yes | A short subject line for the incident. |
| Location | Yes | Search for the address, or select Enter address manually to type it in. |
Incident description
| Field | Required | Notes |
|---|---|---|
| Incident description | Yes | A full account of what happened. |
| Immediate actions taken | Yes | What you did in response. |
Note
A 5-business-day follow-up section appears only when you pick a reportable category. See Reportable incidents.
Evidence and documentation
Attach up to five files (photos, PDFs, Word or text documents), each up to 10 MB. On a new report the files upload once you save, so you will see the note Save the incident to attach and review documents and photos. After saving you can keep adding documents and photos. See Manage and close incidents.
Save the report
Select Create incident at the bottom of the drawer. If a required field is missing, nothing saves and you see a toast telling you what to fix, for example “Select an incident type before saving.”, “Select an NDIS reportable category before saving.”, “Select at least one participant before saving.” or “Describe the incident before saving.”
Once everything is filled in, the report saves with status Open, you see the toast “Incident report saved.”, the drawer closes, and the incident appears in the register.
1 Watch out
If your evidence files fail to upload, the incident still saves. You see “Incident saved, but evidence upload failed: …” with the reason. Reopen the incident and try attaching the files again from Manage and close incidents.
Tip
When an incident is reported by a support worker, the office gets an in-app notification so it can be picked up straight away. This notification cannot be turned off. There is no email.
Incidents reported from the mobile app
A worker can also report an incident from a shift on the OneForce Care mobile app, without needing to be on the web app at all. That report captures the facts only, with no incident type or NDIS reportable category set. Open it here to classify it: choose the incident type and NDIS reportable category, and fill in anything else the mobile form does not ask for. See Report an incident (mobile).