Browse help topics
Consent
Capture consent by e-signature or on paper, with the right signatories.
Last updated · 3 July 2026
The Consent tab records the participant’s consent, for example consent to collect, use and share their information. You can collect it by e-signature or log one already signed on paper. Open the participant, then select the Consent tab.
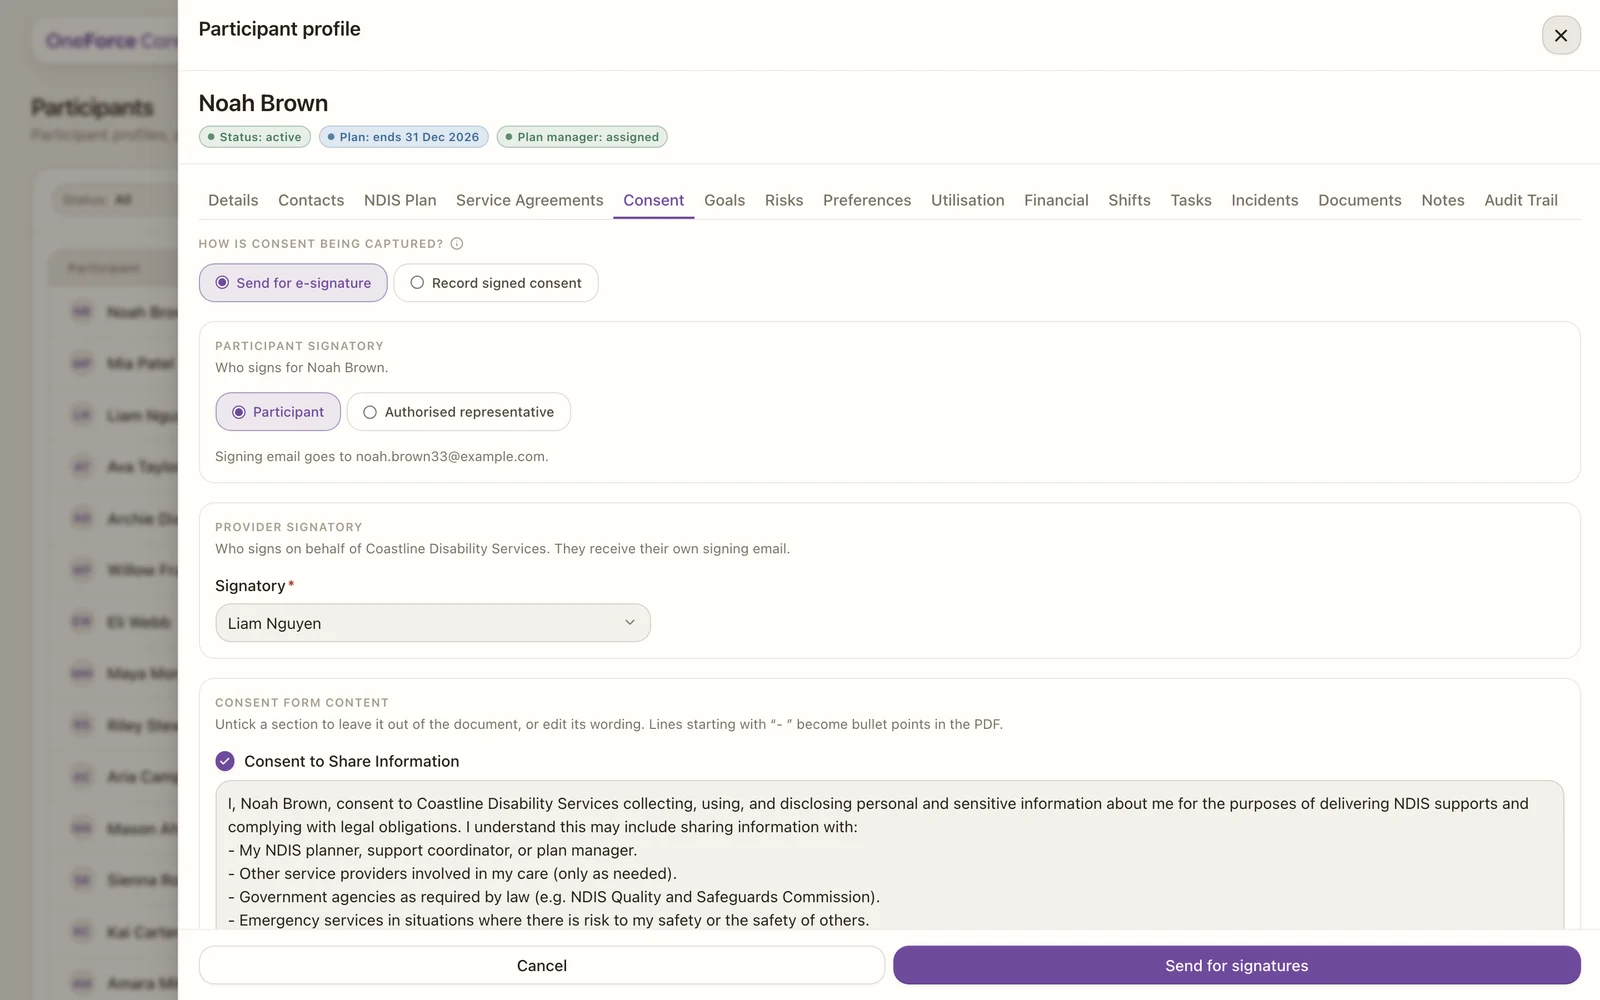 1 2
1 2 Two ways to capture consent
- Send for e-signature: generates the consent form, emails it to the participant (or their representative) and your provider signatory, and marks it signed automatically once both have signed.
- Record signed consent: log consent that was signed outside the app. Enter the Date signed (required) and optionally upload a scan of the signed form.
Who signs for the participant
In e-signature mode, choose who signs for the participant:
- Participant: the signing email goes to the participant’s own email. If they have no email on file, you will be told.
- Authorised representative: a guardian or nominee signs instead. Enter their Name (required), Relationship (optional) and Email (required).
Provider signatory
Choose a worker in your organisation who has an email to sign on behalf of the workspace. This Signatory is required.
Consent form content (e-signature)
Before sending, you can tailor the document: untick a section to leave it out, or edit its wording. The Consent to Share Information section has an optional Named parties field, where you list people (comma-separated, for example a plan manager or GP) to add them to the form.
Send or record
- In e-signature mode, select Send for signatures. Both signing parties need an email, or you will see Missing before sending: listing what is needed. The status moves to Sent for signing, then to Consent signed automatically once both have signed.
- In manual mode, select Record consent to log it as signed.
Once consent is signed, the tab collapses to a read-only status card.