Browse help topics
Invite a worker
Set up a worker and send their login invite.
Last updated · 3 July 2026
You add a worker by inviting them. This creates the worker record and their login, and emails them a link to set a password. The fields you see depend on the operational role you pick.
Open the invite drawer
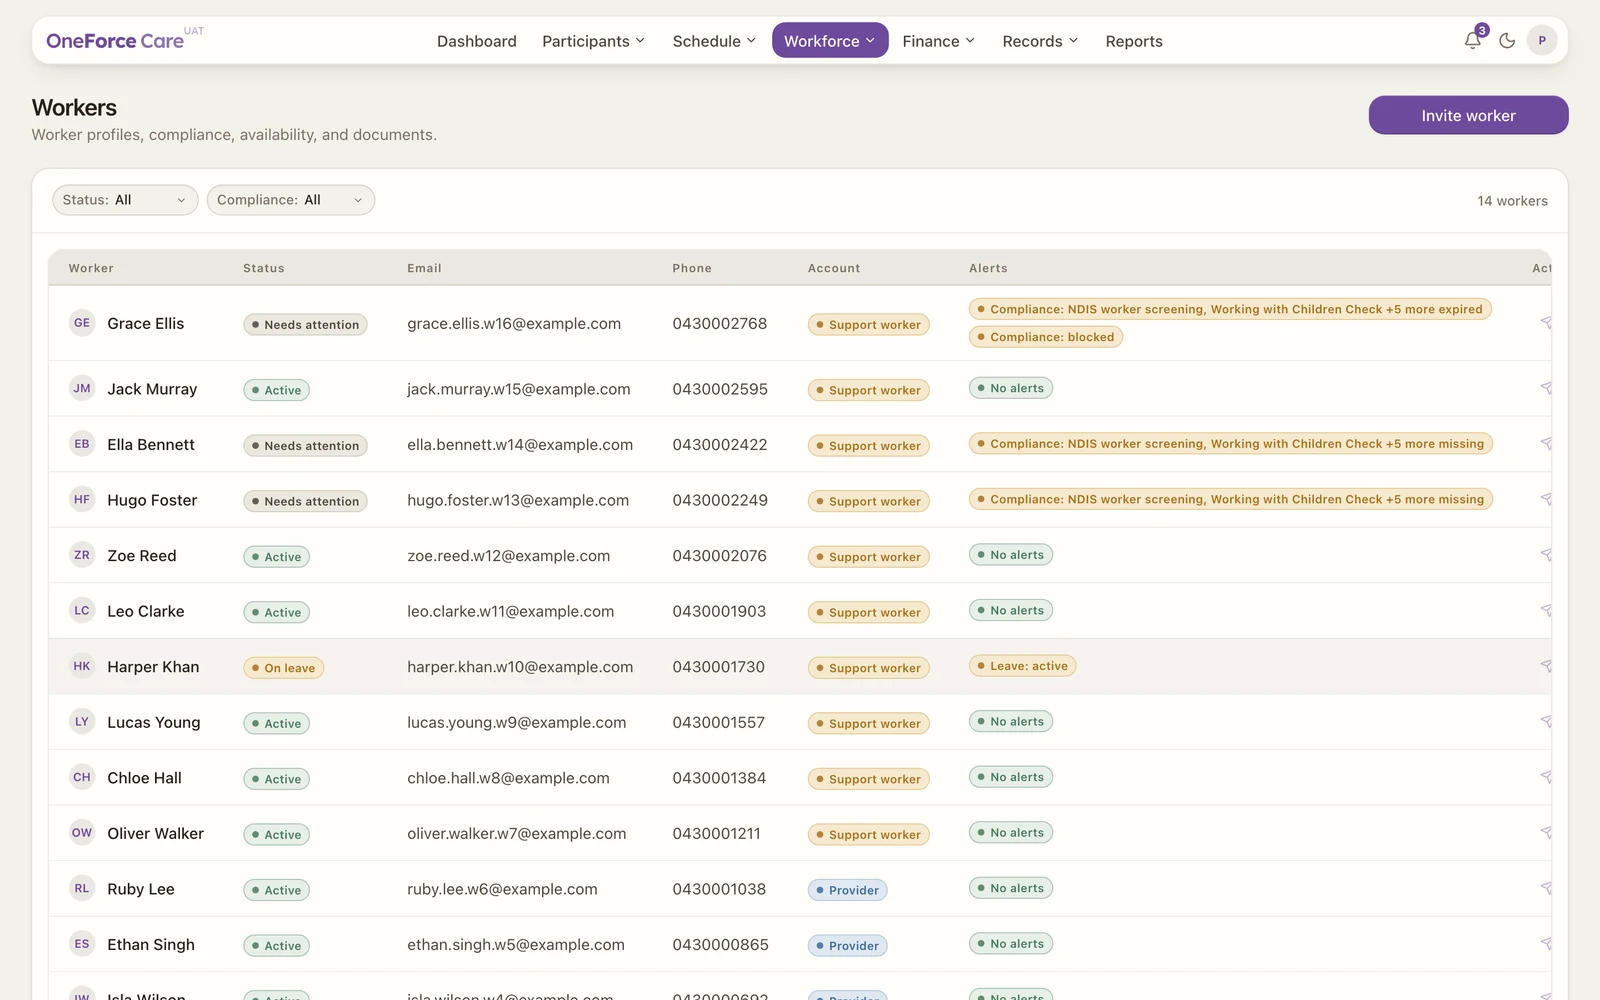
Go to Workforce ›Workers and select Invite worker at the top right. The form opens in a side drawer.
 1
1 Fill in who they are
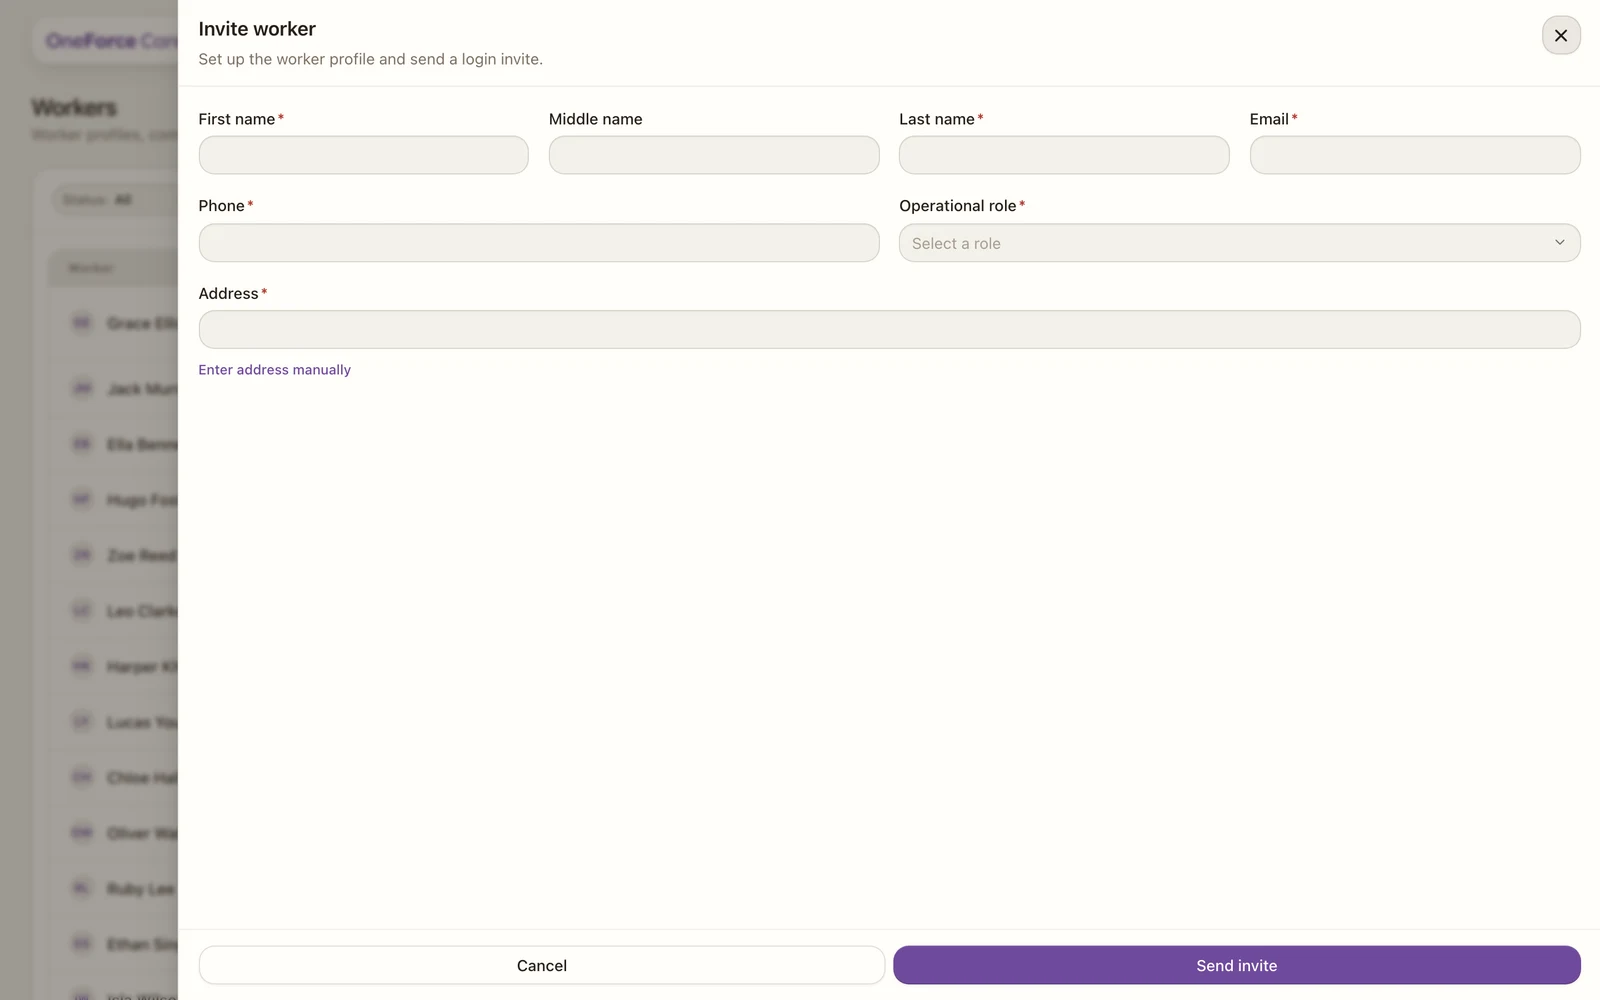
Fields marked with a red asterisk are required.
 1 2
1 2 Personal information
| Field | Required | Notes |
|---|---|---|
| First name | Yes | |
| Middle name | No | |
| Last name | Yes | |
| Yes | The invite is sent here. | |
| Phone | Yes | Australian format. |
| Operational role | Yes | Sets the account type, below. |
Address is required. Start typing and choose the match, or select Enter address manually to set the street and state by hand.
The operational role decides what the worker can do:
- Support worker: delivers support and uses the OneForce Care mobile app. Cannot sign in to the office web app.
- Provider: signs in to the web app and sees only the screens their access role allows. Pick an Access role, or create one. Offered to owners and admins.
- Admin: sees and changes every provider screen. Offered to owners only.
Add support worker identifiers
When the role is Support worker, three more sections appear below.
| Field | Required | Notes |
|---|---|---|
| NDIS Worker Screening ID | Yes | 7 or more digits. |
| ABN | No | 11 digits, checked against the ATO format. |
| Working with Children Check number | No | State formats accepted. |
Under Travel, set the Default travel vehicle (Standard vehicle, or Modified vehicle or bus). Whether you pay this worker for travel is set later, on the Payroll tab.
Send the invite
Select Send invite. The worker is created and emailed a link to set their password.
1 If an invite was just sent to that email, the button shows a short countdown (“Resend in …”) before you can send another.
Note
Compliance, payroll and availability are set later, on the worker profile tabs. The invite just gets the worker set up and signed in. Next: the worker profile.
Tip
Adding several workers at once? Bulk import workers fills them in from a spreadsheet instead; imported workers arrive without a login, and you create one for each from their profile when they’re ready.