Browse help topics
Create a participant
Add a new participant and their core details.
Last updated · 3 July 2026
A participant record is what their plan, agreements, shifts and claims all hang off, so it is usually the first thing you create. You can fill in just the essentials now and complete the rest from the profile later.
Tip
Setting up several participants at once? Bulk import participants from a spreadsheet instead, with their contacts, NDIS plan and budgets in the same run.
Open the create form
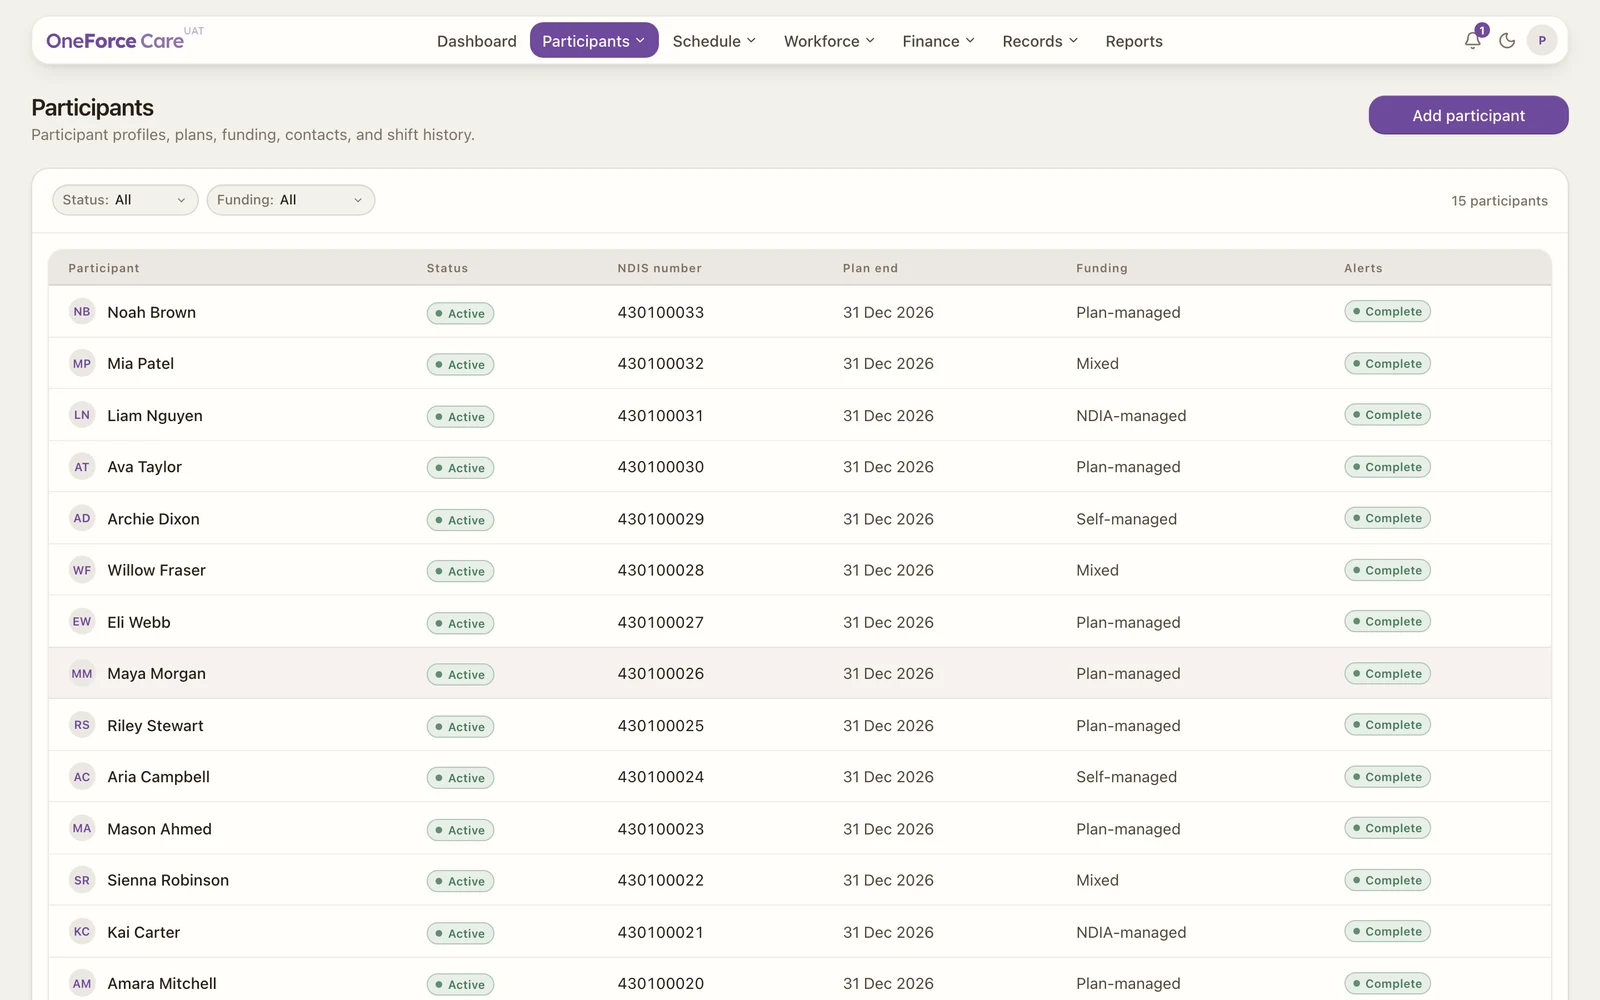
Go to Participants and select Add participant at the top right. The form opens in a side drawer.
 1 2 3
1 2 3 Complete the form
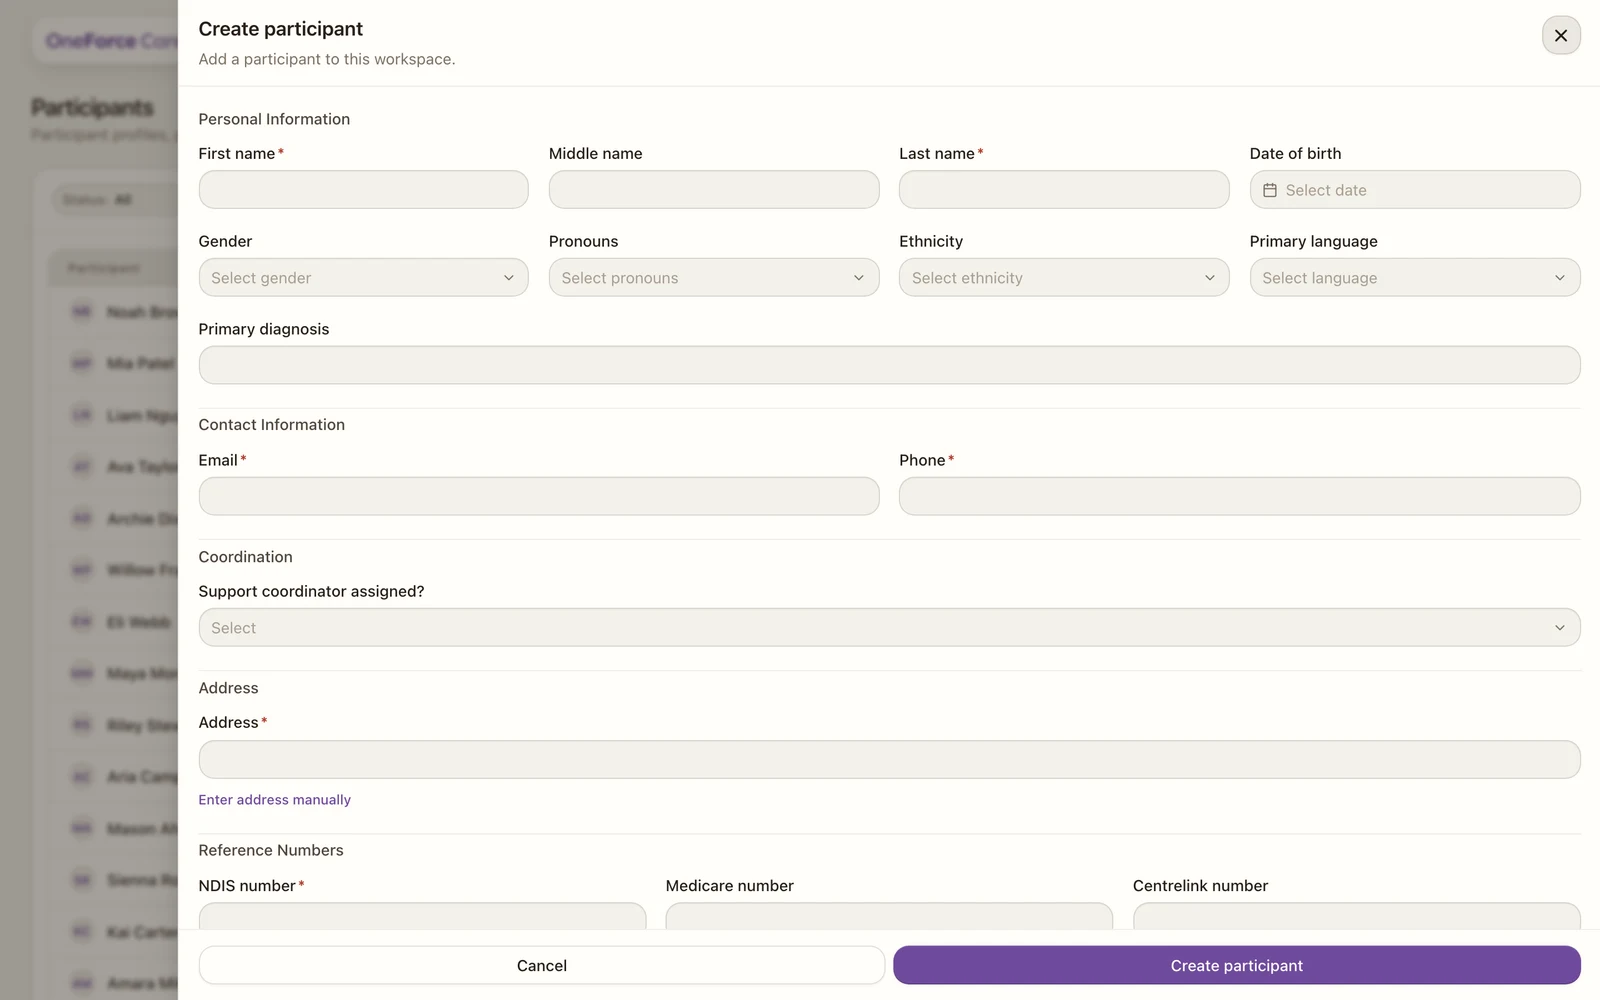
Fields marked with a red asterisk are required. The rest can be added later from the profile.
 1 2 3
1 2 3 Personal information
| Field | Required | Notes |
|---|---|---|
| First name | Yes | |
| Middle name | No | |
| Last name | Yes | |
| Date of birth | No | Date picker |
| Gender | No | Select from list |
| Pronouns | No | Select from list |
| Ethnicity | No | Select from list |
| Primary language | No | Select from list |
| Primary diagnosis | No | Free text |
Contact information
| Field | Required | Notes |
|---|---|---|
| Yes | ||
| Phone | Yes |
Coordination
- Support coordinator assigned? (optional). Records whether the participant has an external support coordinator.
Address
- Address (required). Start typing and choose the match; this also fills in the suburb, state and postcode for you. If the lookup does not find it, select Enter address manually to set the street address, suburb, state and postcode by hand.
- State and Postcode are required whenever an address line is set. If you type a street address but leave the postcode blank (most often after switching to manual entry and not filling it in), saving shows “Select an address from the dropdown, or use ‘Enter address manually’ to set the postcode.” A postcode that isn’t a valid Australian postcode shows “Enter a valid Australian postcode.” Suburb is optional.
Reference numbers
| Field | Required | Notes |
|---|---|---|
| NDIS number | Yes | 8 to 11 digits |
| Medicare number | No | |
| Centrelink number | No |
Save the participant
Select Create participant at the bottom of the drawer. The new participant is added and appears in the list, ready for you to build out their profile.
1 Tip
A new participant starts with the status Created and an NDIS Plan: not started alert. Add their plan next so shifts can be scheduled and claimed: Set up the NDIS plan.