Browse help topics
Add a contact
Add a plan manager, coordinator, clinician or other contact to the directory.
Last updated · 2 August 2026
You create directory records from the two contact views. Use Professional contacts for plan managers, support coordinators and clinicians, and Contacts for nominees, guardians, family, advocates, government, provider partners, emergency contacts and others. The form is the same in both; what differs is the contact type you choose.
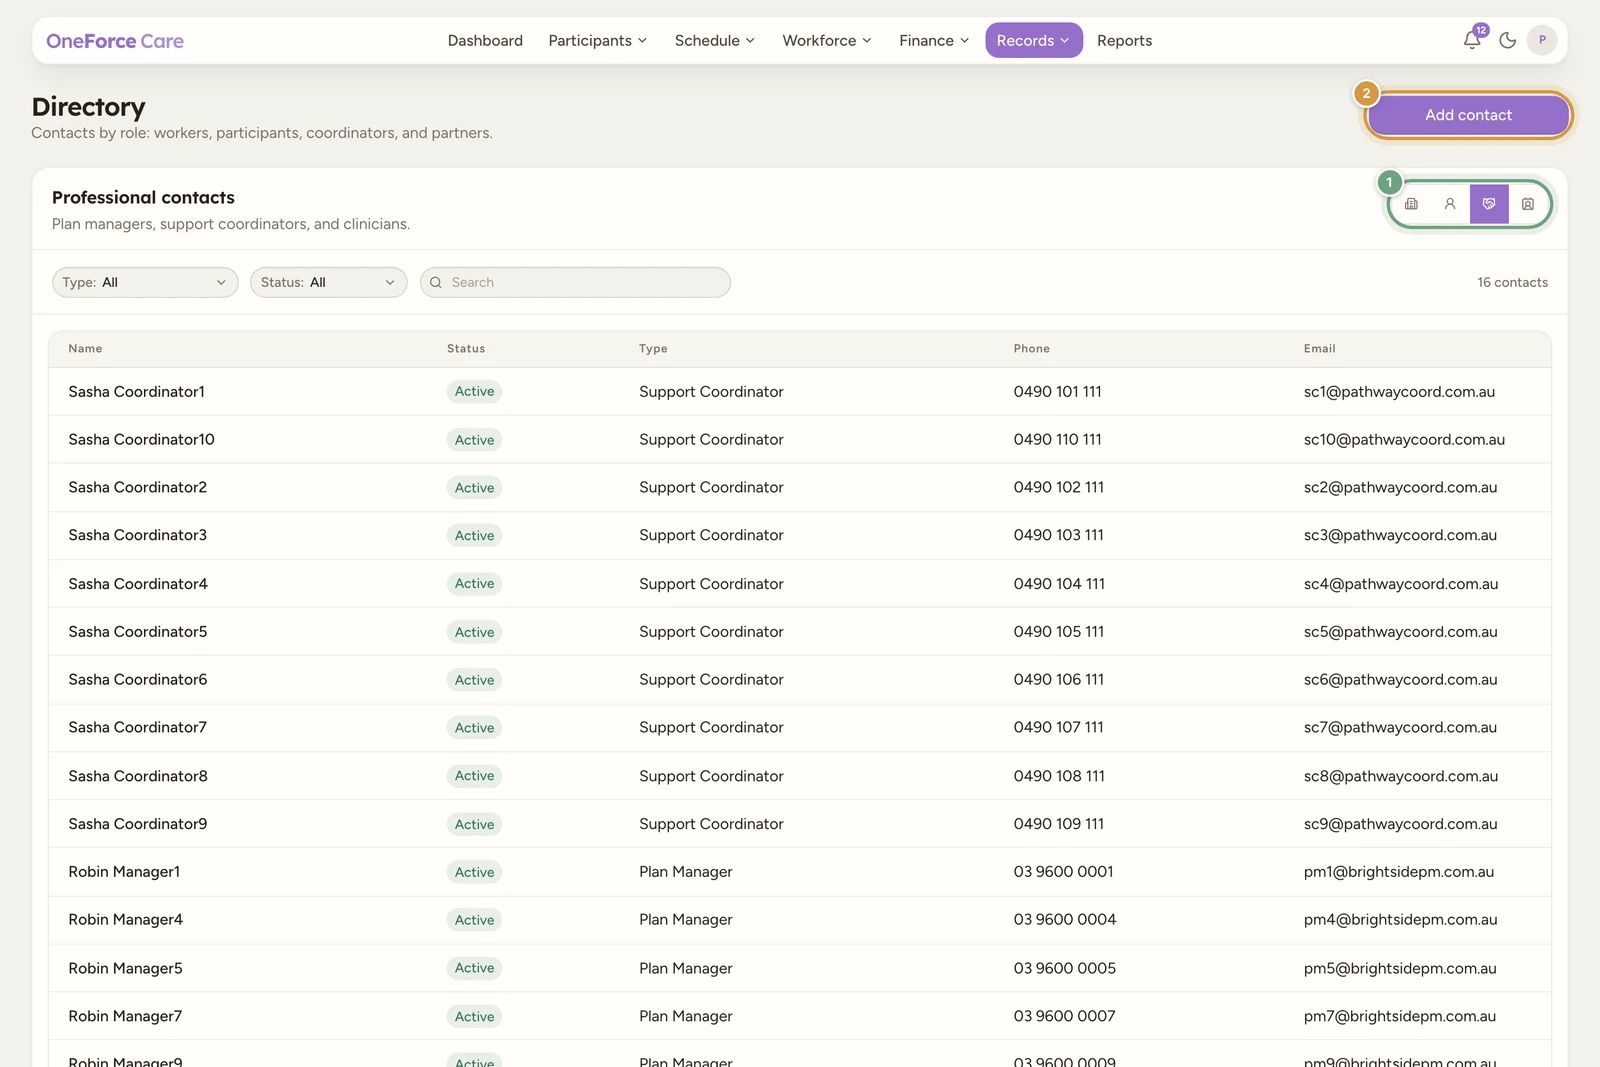
Switch to a contact view
Go to Records›Directory and use the icon toggle at the top right of the panel to switch to Professional contacts or Contacts. The Add contact button then appears at the top right (it needs your role to have permission to create directory contacts; if it doesn’t, the button doesn’t appear).
Complete the form
Select Add contact to open the drawer. Fields marked with a red asterisk are required. Choose the Contact type first, because it decides which extra fields appear (for example Business name, Relationship, or Acts as plan manager) and whether Email is required.
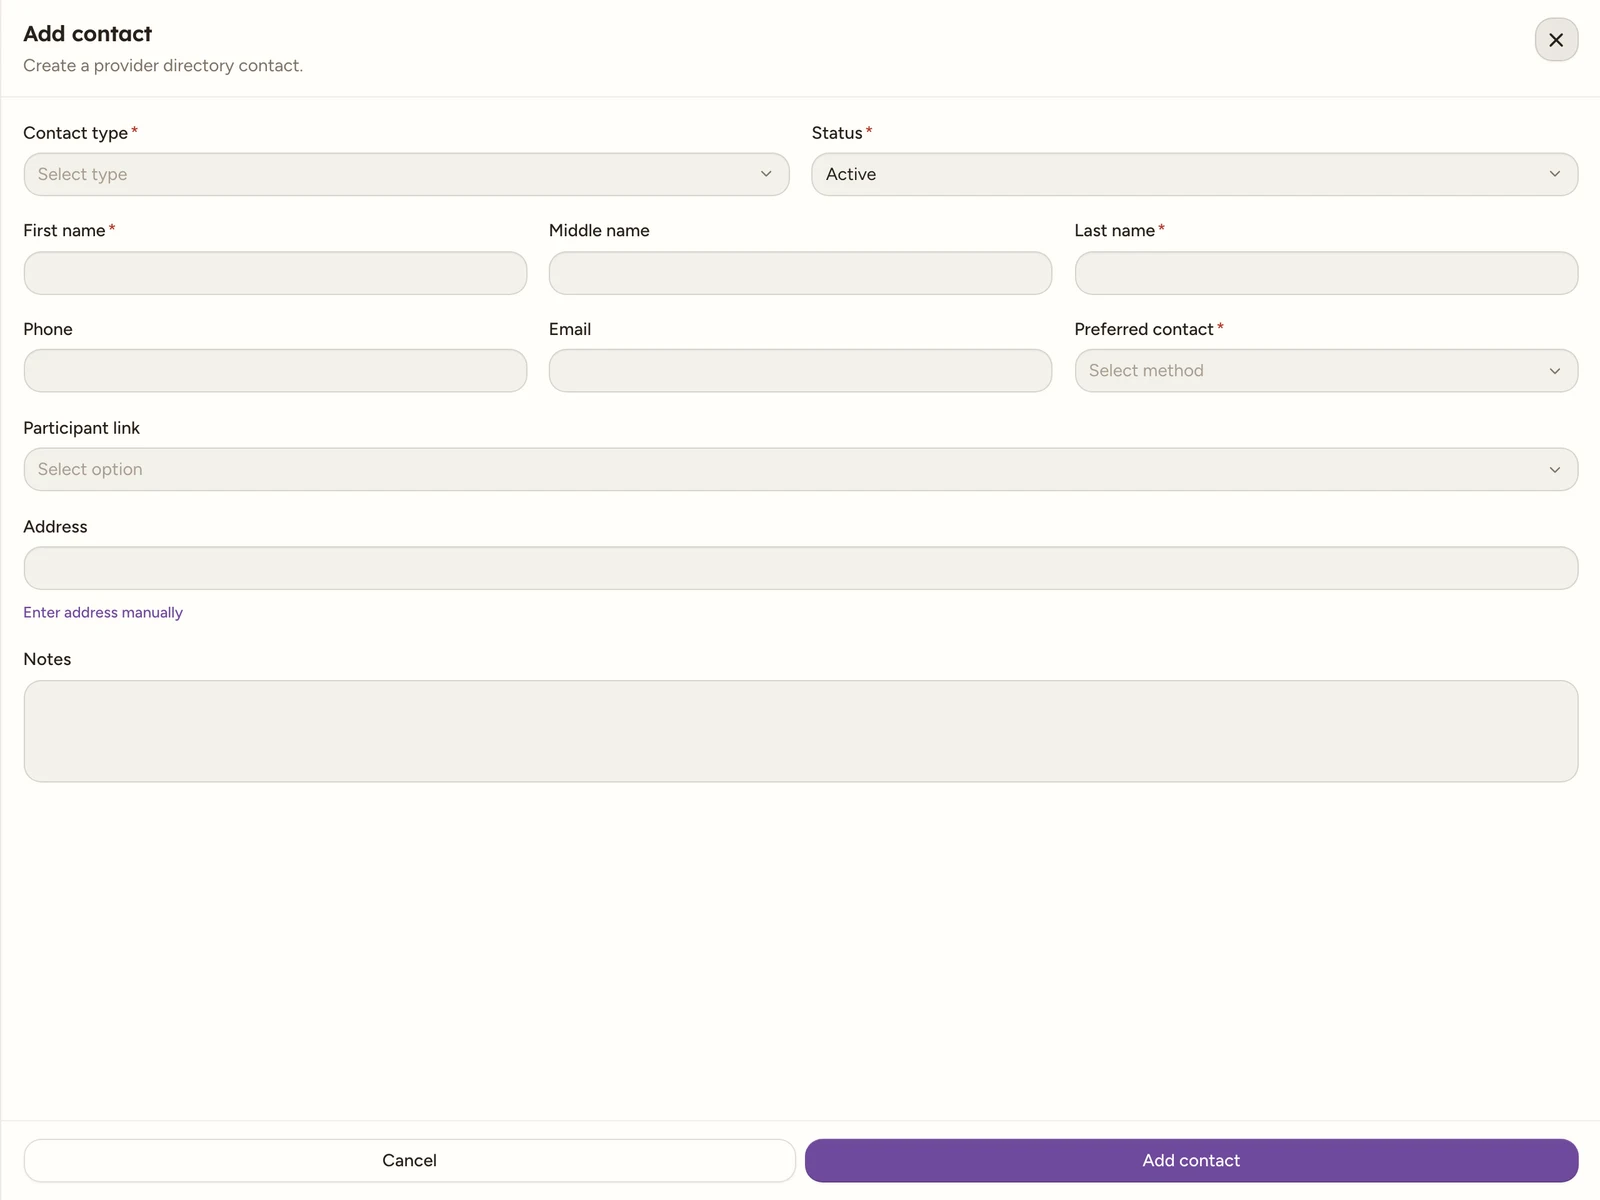
| Field | Required | Notes |
|---|---|---|
| Contact type | Yes | Choose first. Options: Nominee, Guardian, Support coordinator, Plan manager, Clinician, Provider partner, Emergency contact, Family, Advocate, Government, Other. |
| Status | Yes | Active or Archived. Defaults to Active. |
| First name | Yes | |
| Middle name | No | |
| Last name | Yes | |
| Relationship | No | Shown only for personal types (nominee, guardian, family, emergency contact). |
| Business name | No | Shown for every non-personal type, not only the three professional ones. |
| Acts as plan manager? | Yes when shown | Appears only when the type is Support coordinator. Defaults to No. |
| Phone | No | Validated as an Australian phone number if you enter one. |
| Conditional | Required for plan managers, support coordinators and clinicians. Optional for other types, but validated as a proper email address if you enter one. | |
| Preferred contact | Yes | Phone, Email or SMS. |
| Participant link | No | Link the contact to one of your participants (see below). |
| Address | No | One search box: start typing and choose the match, which fills in the suburb, state and postcode for you. If the lookup can’t find it, select Enter address manually underneath and the field splits into Address, Suburb, State and Postcode. Search for an address instead takes you back, with the whole address line already in the box. |
| Notes | No | Free text. |
Note
If something is missing or invalid, saving fails and the form shows a message such as “First and last name are required.”, “Contact email must be a valid email address.” or “Contact phone must be a valid phone number.” Fix the field the message points to and select Add contact again.
Save the contact
Select Add contact at the bottom of the drawer. You see the toast Contact saved., the drawer closes, and the contact appears in the view you are in.
Why plan managers, support coordinators and clinicians need an email
These three types are the ones OneForce Care treats as reusable across participants: from a participant’s own Contacts tab you can pick an existing plan manager, support coordinator or clinician instead of retyping them (see Participant contacts). Reusing a contact creates its own linked record rather than sharing one, so the same person can end up as more than one row in the directory, one per participant they support.
To recognise these as “the same” contact, for example so Professional contacts lists them once and each copy’s Linked to tab shows every participant they are linked to, OneForce Care matches rows first by email, then by phone, then by name, business name and contact type all together. Email is the most reliable match (people share phones, and names collide), which is why it is required for plan managers, support coordinators and clinicians specifically. Leaving it off makes the same person harder to recognise as one contact across your participants.
Link a contact to a participant
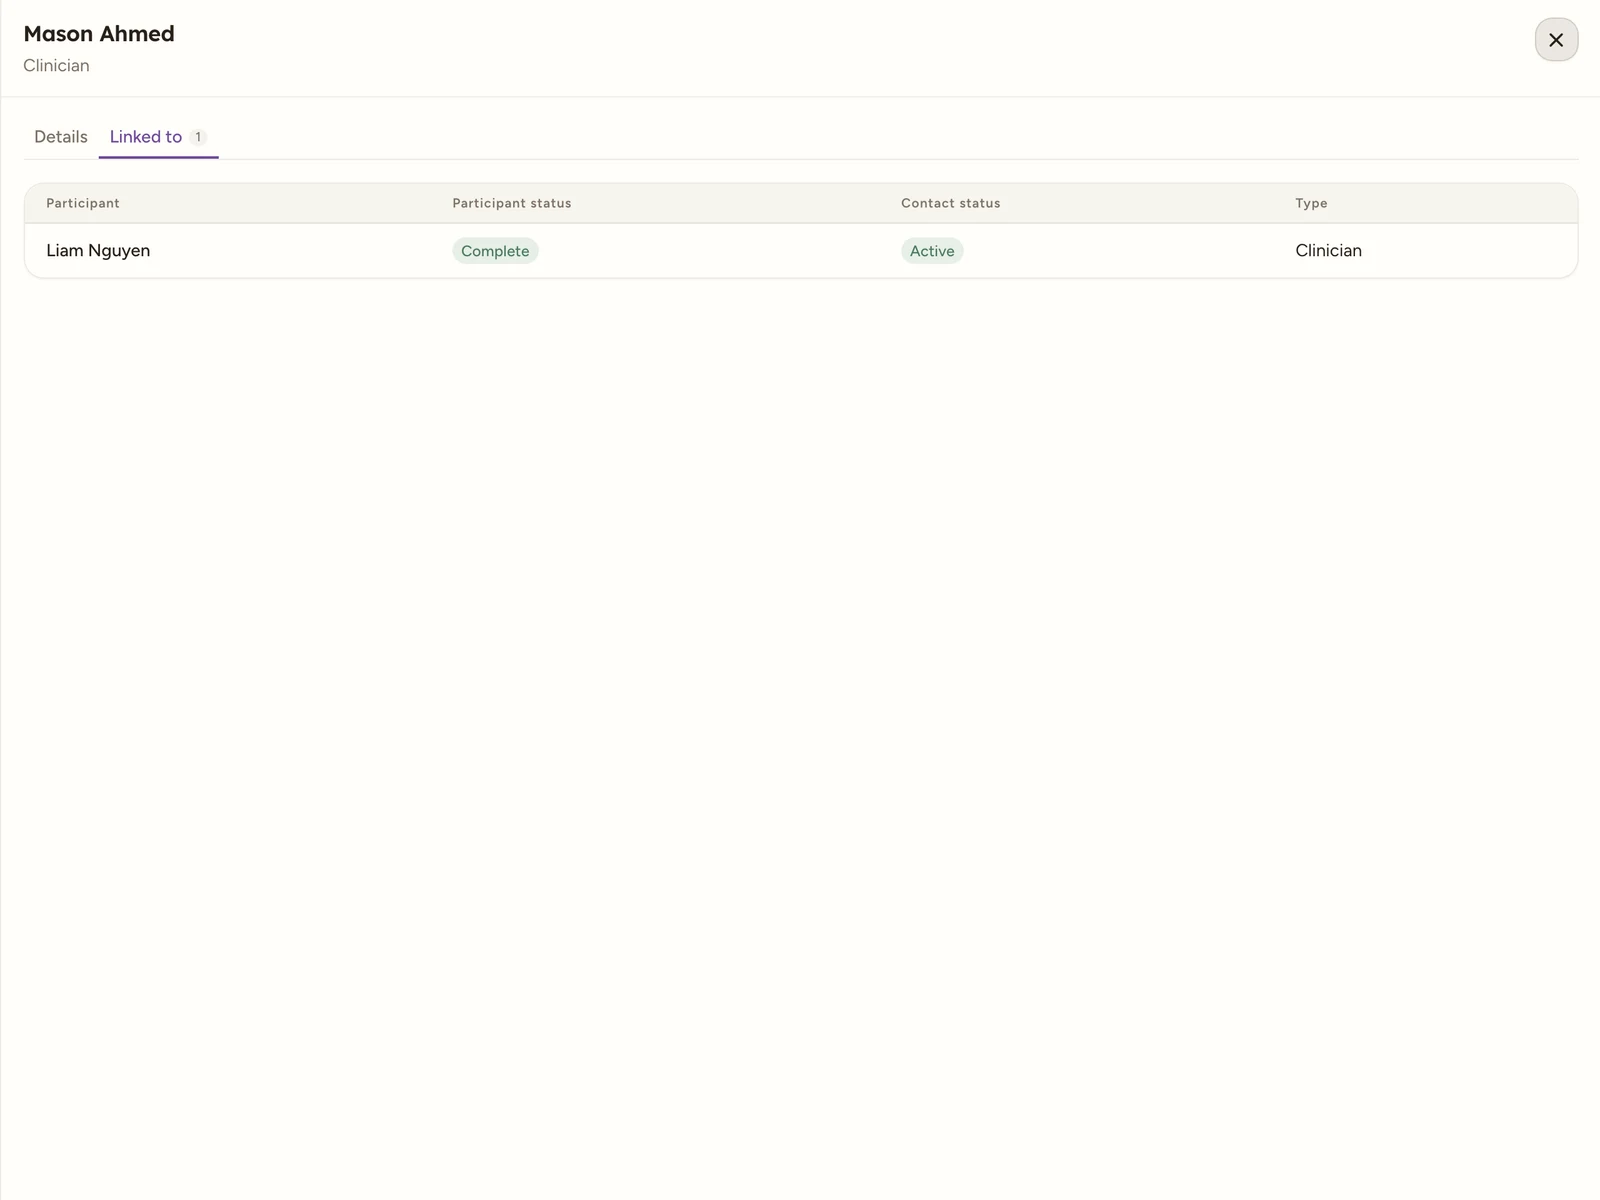
To connect a contact to a single participant, set the Participant link field on the form and save. After saving, reopen the contact; a saved contact’s drawer shows two tabs, Details and Linked to (with a count of linked participants). Open Linked to to see every participant the contact matches by the same email/phone/name rule above, with each row’s participant status, contact status and contact type. Selecting a linked participant opens their profile (or a summary panel, depending on your access to Participants).
Tip
To link the same plan manager, support coordinator or clinician to several participants at once, add them from each participant’s own Contacts tab and choose the existing contact there, rather than repeating this page. See Participant contacts.
Edit or archive a contact
In the Professional contacts or Contacts view, select a row to reopen it on its Details tab. If your role can edit directory contacts, make your changes and select Save contact. If your role can only view (no edit permission), the drawer shows an alert reading “Read-only. Your role does not have edit access.” and the fields are disabled; if you also have delete rights you still see an Archive contact button, otherwise the drawer has no action buttons at all.
To remove a contact, select Archive contact at the bottom of the drawer. This takes effect immediately, with no confirmation step, and you see the toast Contact archived.
Note
Archiving sets the contact’s status to Archived rather than deleting it, so it drops out of the active list but its history is kept.