Browse help topics
Billing overview
The two charge tables, where rows come from, and the Generate and Add manual charge actions.
Last updated · 2 August 2026
The Billing screen is your charge work queue. Every approved shift and every manual charge lands here as a row, and your job is to clear anything that needs attention, then Generate the rows that are ready into invoice batches and NDIS claims.
Open it from Finance›Billing.
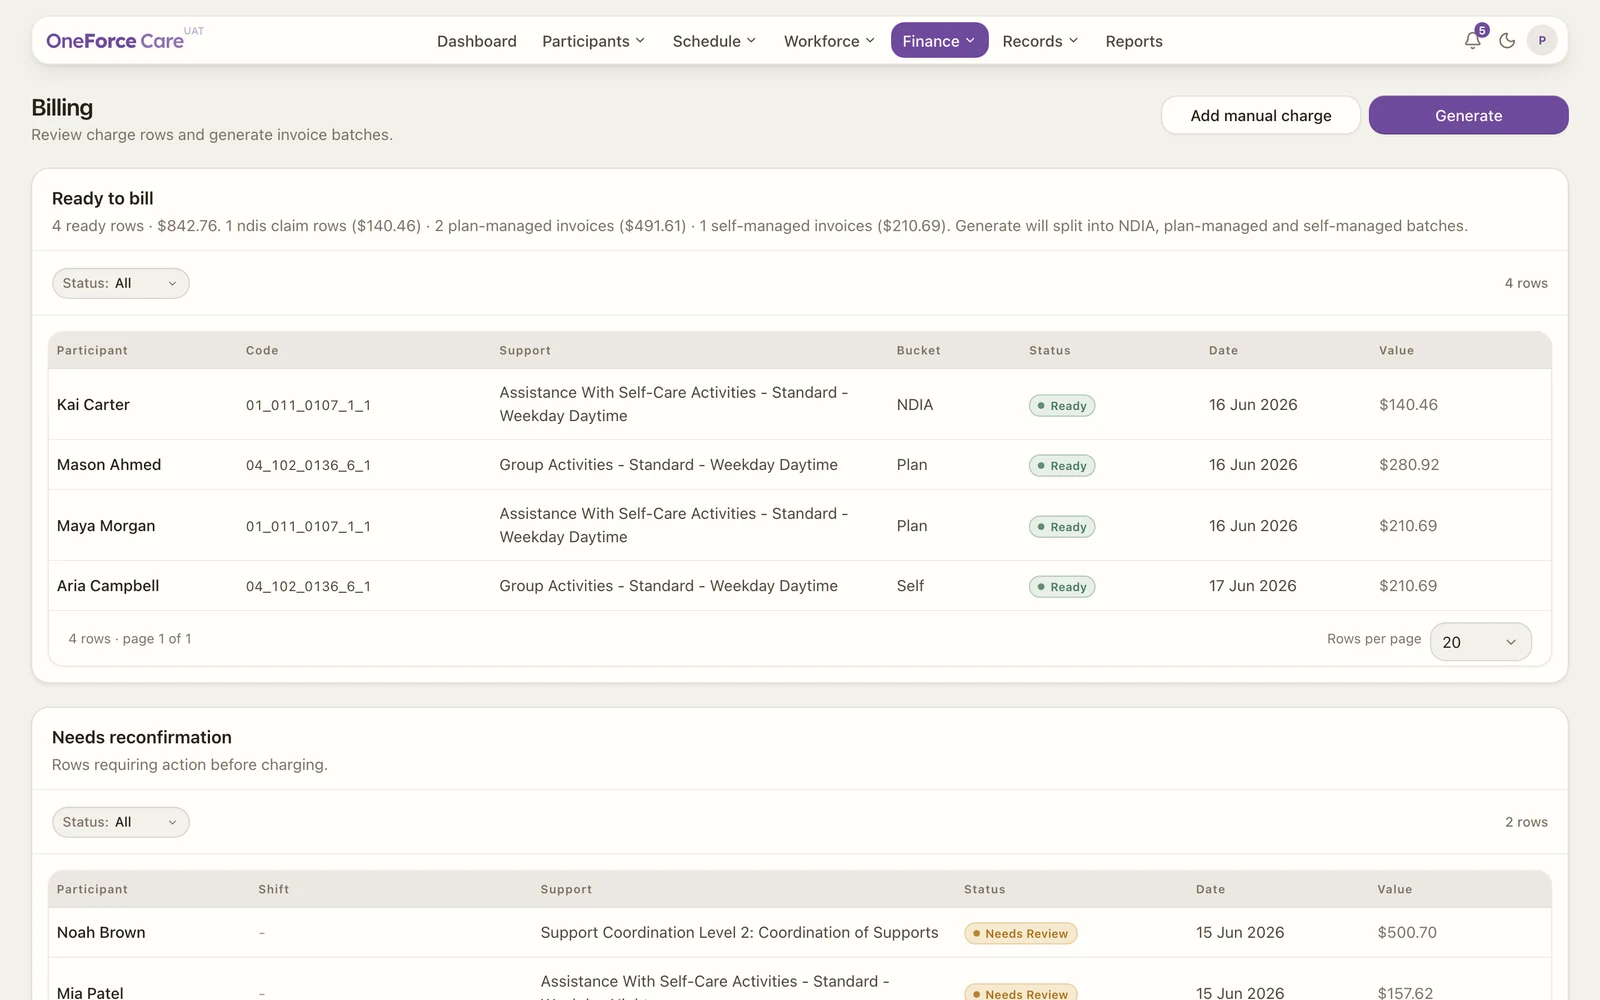
The page title is Billing and the subtitle reads “Review charge rows and generate invoice batches.”
Where rows come from
A charge row arrives on Billing in one of two ways:
- From a shift. When a shift is approved, the platform turns the delivered support into one or more charge rows automatically. These rows carry the shift, worker and support details.
- By hand. You can add a one-off charge that is not tied to a shift with Add manual charge (see Add a manual charge).
Each row then sits in one of the two tables, depending on whether it is clear to bill.
The two tables
| Table | What is in it | Columns |
|---|---|---|
| Ready to bill | Rows that are clear to charge | Participant, Worker, Code, Support, Bucket, Status, Date, Value |
| Needs reconfirmation | Rows with a blocker to resolve first | Participant, Shift, Worker, Support, Date, Value |
Each table has its own Status filter (All, Needs review, Ready), so you can narrow a long list.
In Ready to bill, the Support column carries a small band tag beside the support name (Daytime, Evening, Night, Saturday, Sunday or Pub. holiday) so a band-split shift reads clearly as several rows. The Bucket column shows where each row will land when you generate: NDIA, Plan or Self. The line under the heading counts the ready rows and totals, and notes that Generate will split them into NDIA, plan-managed and self-managed batches.
Needs reconfirmation has no Status column: every row in it is awaiting review by definition. It gains a Shift column instead, so you can see at a glance which shift a blocked charge came from. When more than one row is held only because the office edited the worked time, the panel header also offers a bulk Include all in billing (N) button.
Select any row to open its drawer. Shift-backed rows open the Shift assignments drawer (the timesheet and support lines behind the charge); manual rows open the Manual charge drawer. Either way, a blocked row’s drawer carries Include in billing as its footer action.
The two actions
- Add manual charge adds a charge by hand. A new manual charge always starts in Needs reconfirmation until you confirm its budget draw-down.
- Generate turns the ready rows into batches. NDIA rows produce an NDIS claim CSV; plan-managed and self-managed rows produce PDF invoices, which also push straight into Xero as drafts when your organisation is connected. See Generate invoice batches.
Note
If your role cannot create or finalise charge rows, the page shows a read-only banner and the action buttons are greyed out rather than removed. You can still review both tables. The banner and the buttons watch different permissions, so a role with Create on Invoicing but not Edit still sees the banner while the buttons work, and a role with Edit but not Create gets no banner but cannot press anything.
Tip
Work the Needs reconfirmation table first so nothing is left behind, then generate. Start with Fix billing blockers. Once batches are generated you record money in against them on Payments.