Browse help topics
Roles and access
Who can see what: owners, admins, provider employees and support workers.
Last updated · 2 August 2026
Every person in your workspace has a role, and the role decides which menus, screens and actions they can use. Understanding the four roles helps you invite the right people and give them the right access.
The four roles
| Role | What they can do |
|---|---|
| Owner | Full access to everything, plus the settings only an owner sees: business details, invoicing, the subscription, the Xero connection, and workspace features. There is exactly one owner per workspace. |
| Admin | Full access to the day-to-day app (participants, scheduling, finance, reports and so on), plus role-based access. Can’t open Invoicing, Subscription, Integrations or Features. |
| Provider employee | Access only to the screens and actions their assigned custom role allows. Shown as Provider when you set a worker’s account type. |
| Support worker | Delivers shifts. Support workers sign in to the OneForce Care mobile app only and have no access to the office app. |
Note
Support workers never see the office app, so anything you want them to do on a shift (notes, clock in and out, incidents) happens in the mobile app. See the Mobile app guides.
Where access is set
The Account›Organisation tab holds both business details and role-based access, and it looks different depending on who opens it:
- Owners see their Business details card, with the Role-based access section underneath it.
- Admins see only Role-based access; it’s the whole tab for them.
- Provider employees and support workers don’t get an Organisation tab at all.
Custom roles
In Role-based access, select Create role to name a new role and choose which screens it can read, and which of create, edit and delete it also allows on each one. The table lists every role you’ve created:
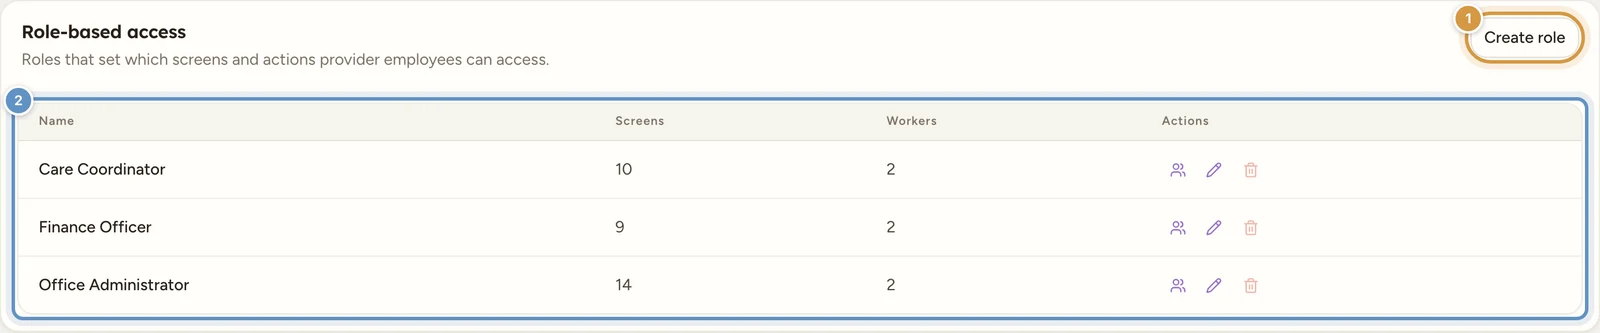
| Column | Shows |
|---|---|
| Name | The role’s name |
| Screens | How many screens it can read |
| Workers | How many people are currently assigned to it |
| Actions | View the people assigned, Edit, and Delete |
Before you create any roles, the table reads “No roles yet. Create one to assign permissions to provider employees.” A role with people still assigned can’t be deleted; the delete action is disabled with a tooltip such as “3 workers assigned. Reassign first.” Deleting an unassigned role opens a confirm dialog titled Delete “<role name>”?, warning “This role will be permanently deleted. Workers currently assigned to it will lose their access role.”
Note
Owners and admins always have full access, whatever a custom role says. Roles only shape what provider employees can do.
A person’s account type
A worker’s access is set on their own record, on the Access tab: Support worker, Provider (a provider employee, who then also picks one of your custom roles) or Admin. See Worker access for creating their login, resending invites and resetting passwords.
Two-factor authentication
On the Account›Account tab, the owner gets a Workspace MFA enforcement card that requires two-factor authentication separately for each group: Owner (you), Admins, Provider employees, and Support workers (mobile app), which is enforced in the mobile app only. Turning a group on asks you to confirm, for example “Require 2FA for Admins?”, and those members must set it up on their next sign-in. Turning a group off removes 2FA from anyone in it who isn’t required by another rule.
Tip
Invite your team from Workforce›Workers with Invite worker, then set each person’s account type on their Access tab. See Invite a worker.