Browse help topics
Documents
Attach files to the participant record, with a type and a name.
Last updated · 2 August 2026
The Documents tab keeps files attached to the participant record: plans, agreements, consent forms, risk assessments, reports and anything else worth holding on file. Attached documents are listed under Linked Documents below the upload panel.
Open the Documents tab
Open the participant, then select the Documents tab. The Add document panel is at the top.
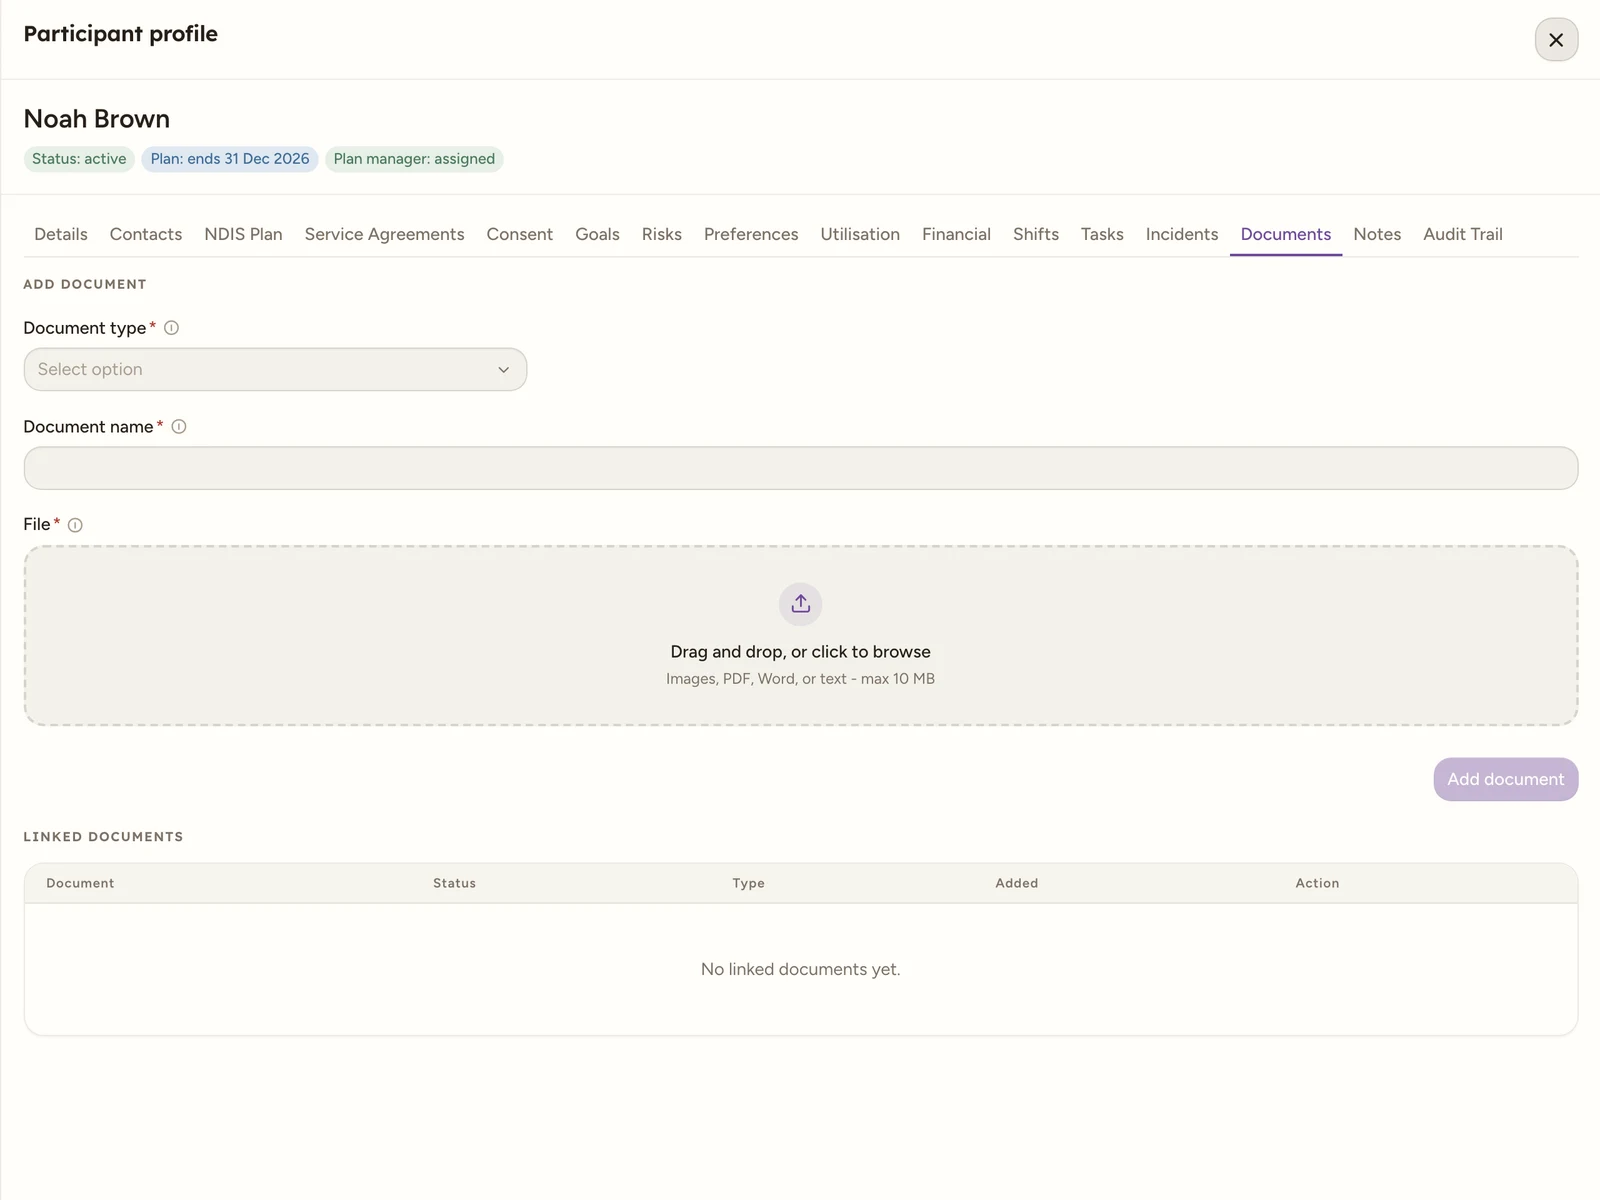
Choose a type, name it, and add the file
| Field | Required | Notes | | — | — | — | | Document type | Yes | NDIS plan, Service agreement, Consent, Risk assessment, Incident report, Intake, Report or Other | | Document name | Yes | A name for the file | | File | Yes | Drag and drop, or click to browse. Images, PDF, Word or text, up to 10 MB |
Upload
Select Add document. The button stays disabled until a type, a name and a file are all set. After uploading you will see Document uploaded. and the file appears in the Linked Documents table.
In the Linked Documents table you can open a document (it downloads in a new tab) or delete it. Deleting asks you to confirm and shows Document deleted.