Browse help topics
Record a payment
Record an amount, date and reference against a batch, and attach evidence.
Last updated · 2 August 2026
When money comes in against an invoice batch, you record it here so the batch’s outstanding balance drops and, once the invoice is settled, its status moves to Paid. You can also attach the remittance advice or receipt as evidence. On an NDIA batch the same drawer carries the claim-results import, so the outcomes and the money are recorded together: see Reconcile NDIA claim results.
Open the Record payment drawer
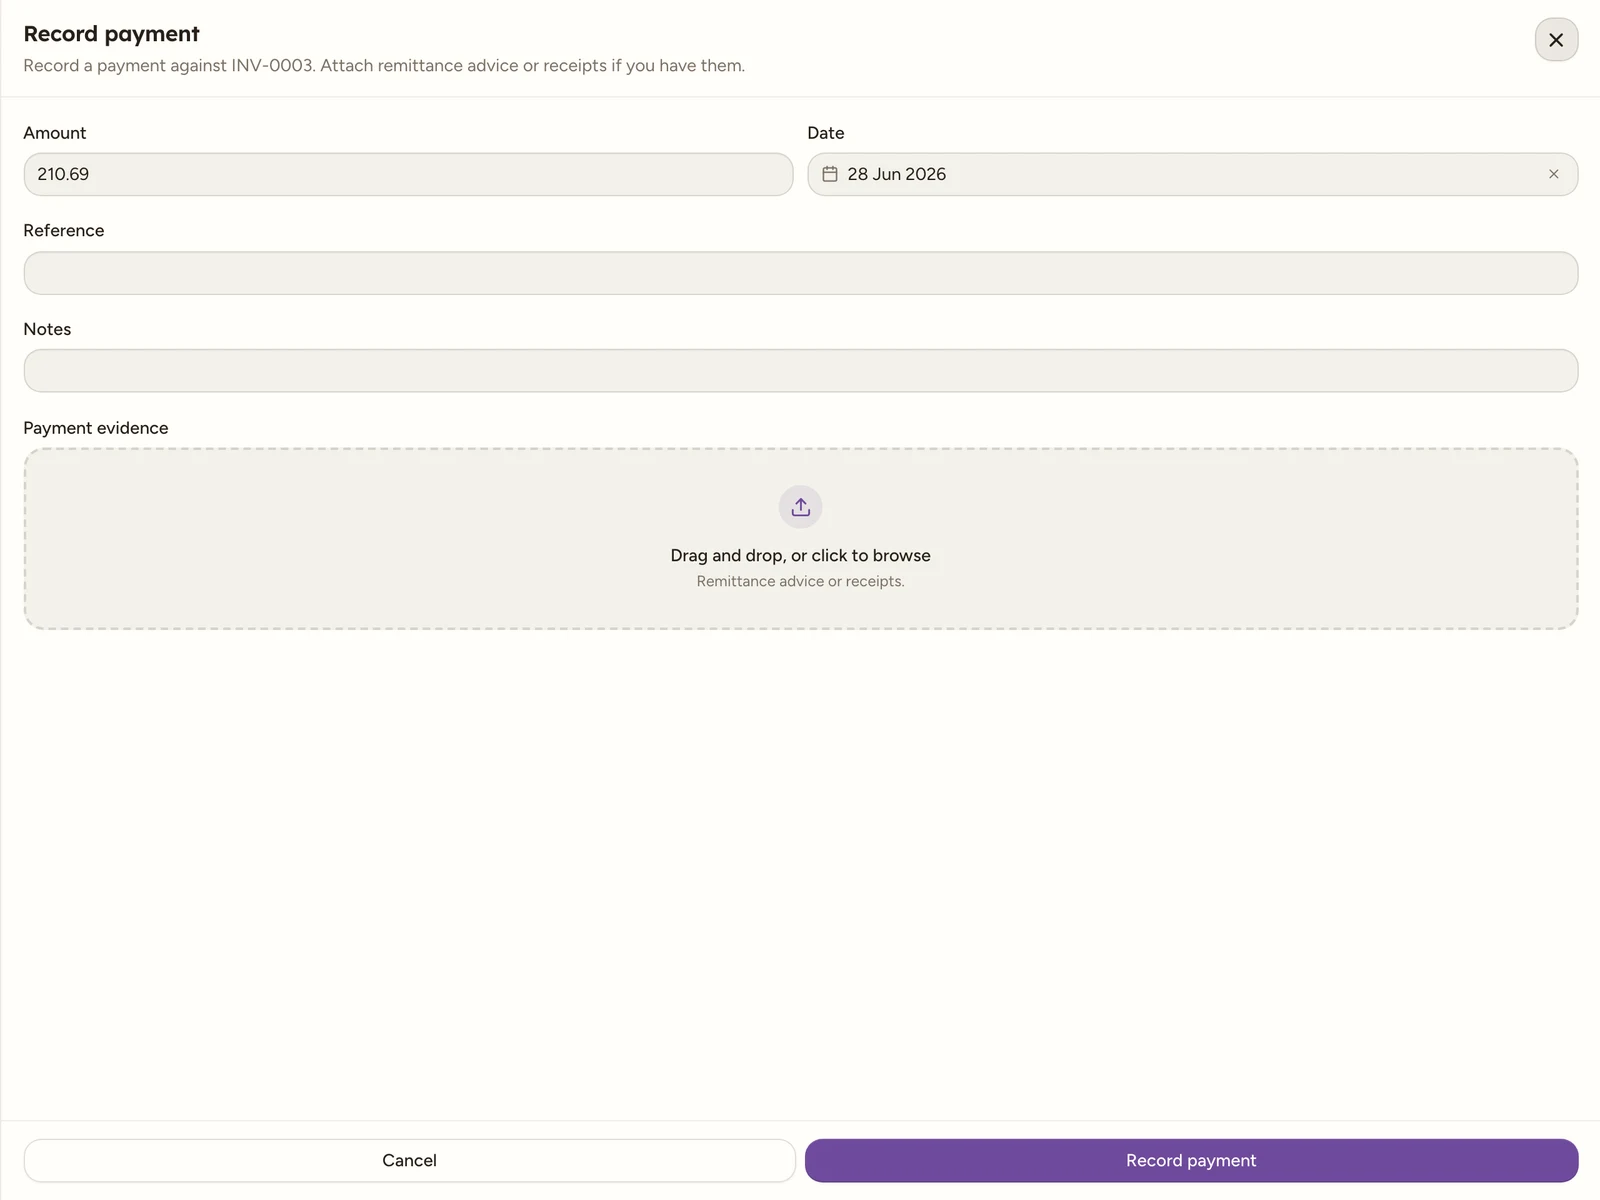
Go to Finance›Payments, find the batch in the Invoice batches table, and select the money icon in the Action column. While the batch still owes money the icon is a banknote and its label reads Record payment; once the batch is settled it becomes a paperclip labelled Payment evidence. Either way the Record payment drawer opens, headed “Record a payment against [invoice number]. Attach remittance advice or receipts if you have them.”
Choose the record type
At the top of the drawer, Record type defaults to Payment. Leave it as Payment for cash that has actually landed in your bank account. Switch it to Recovery for a debt the NDIA netted from the remittance instead of paying it, for example an overpayment from an earlier claim. A note under the pills explains: “A debt the NDIA netted from this remittance. It discharges the invoice without cash being received; enter the recovered amount as a positive number.”
The small information icon beside the label spells the difference out in full: both kinds reduce the batch’s outstanding balance and both count toward Settled, but when a recovery exists the Settled card splits cash from recovered, so cash received is never overstated.
Enter the payment
The amount is pre-filled with the batch’s outstanding balance, and the date defaults to today. Adjust them as needed.
| Field | Required | Notes |
|---|---|---|
| Record type | Yes | Payment (cash received) or Recovery (an NDIA debt netted from the remittance). Defaults to Payment. |
| Amount | Yes | Pre-filled with the outstanding balance. Must be greater than 0, and cannot exceed the batch’s current outstanding balance. |
| Date | Yes | Defaults to today. |
| Reference | No | For example the EFT or remittance number. |
| Notes | No | Free text. |
| Payment evidence | No | Attach remittance advice or receipts. Up to 10 MB per file. Any existing evidence is listed below the field. |
Save the payment
Select Record payment (the button reads Record recovery when Record type is set to Recovery). The entry is added to Payment history with a recovery tag if it is a recovery, and the batch’s Outstanding drops by that amount. A toast confirms Payment recorded. or Recovery recorded. If the amount covers the full outstanding balance, the batch flips to Paid.
NDIA batches: the claim results come first
On an NDIA batch the drawer opens with an extra block at the top, Claim results: “Import the NDIA bulk payment results file for this batch to record its claim outcomes.” Import the results file there first, and the drawer fills the Amount field with the accepted total for you, so the payment you record matches what the NDIA actually paid. Anything you have already typed into Amount is left alone. The full walk-through is on Reconcile NDIA claim results.
Partial payments
There is no partially paid status. A payment for less than the outstanding balance reduces Outstanding and appears in Payment history, but the batch stays Finalised (or Draft) until it is paid in full. Record further payments and recoveries the same way until the balance reaches zero and the batch becomes Paid.
Attaching evidence to a settled batch
Once a batch is Paid (fully settled, not void), the paperclip still opens the drawer. Its description changes to “Payment fields are locked for [invoice number]. You can still attach evidence.”, the money fields are locked, and you can only attach files. The submit button reads Upload evidence, and saving shows Evidence uploaded.
Watch out
A Void batch is different: its icon is disabled outright (tooltip “Batch is void”), so the drawer cannot be opened at all, not even to attach evidence.
Watch out
Recorded payments and recoveries are permanent. They cannot be edited, reduced or deleted in the app, and once any payment exists the batch can no longer be voided. Check the Record type, Amount and Date before you save.
Note
A few checks run before a payment saves: the amount must be greater than zero (Payment amount must be greater than 0.), it cannot exceed the outstanding balance (Amount exceeds the outstanding balance (…) by (…). Record up to the outstanding amount and query the remainder with the payer.), and a date is required (Choose a payment date.).
Note
Without payments edit access the icon still opens nothing: selecting it shows You need payments edit access to record payments. instead of the drawer.