Browse help topics
Roles and permissions
Create a role, choose its screens and actions, assign people, and delete a role.
Last updated · 2 August 2026
Roles set which screens a provider employee can open and what they can do on each one. Owners and admins manage them in the Role-based access section on the Account›Organisation tab (below the business details, for owners who also see that card).
Note
Owners and admins always have full access. Roles only shape what provider employees can do. Support workers use the mobile app and are not covered by roles. If you’re an admin rather than the owner, Role-based access is the only thing you’ll see on the Organisation tab.
Open Role-based access
Go to Account›Organisation and scroll to Role-based access. The table lists each role with its Name, the number of Screens it can read, and the number of Workers assigned. When you have none yet, it reads No roles yet. Create one to assign permissions to provider employees.
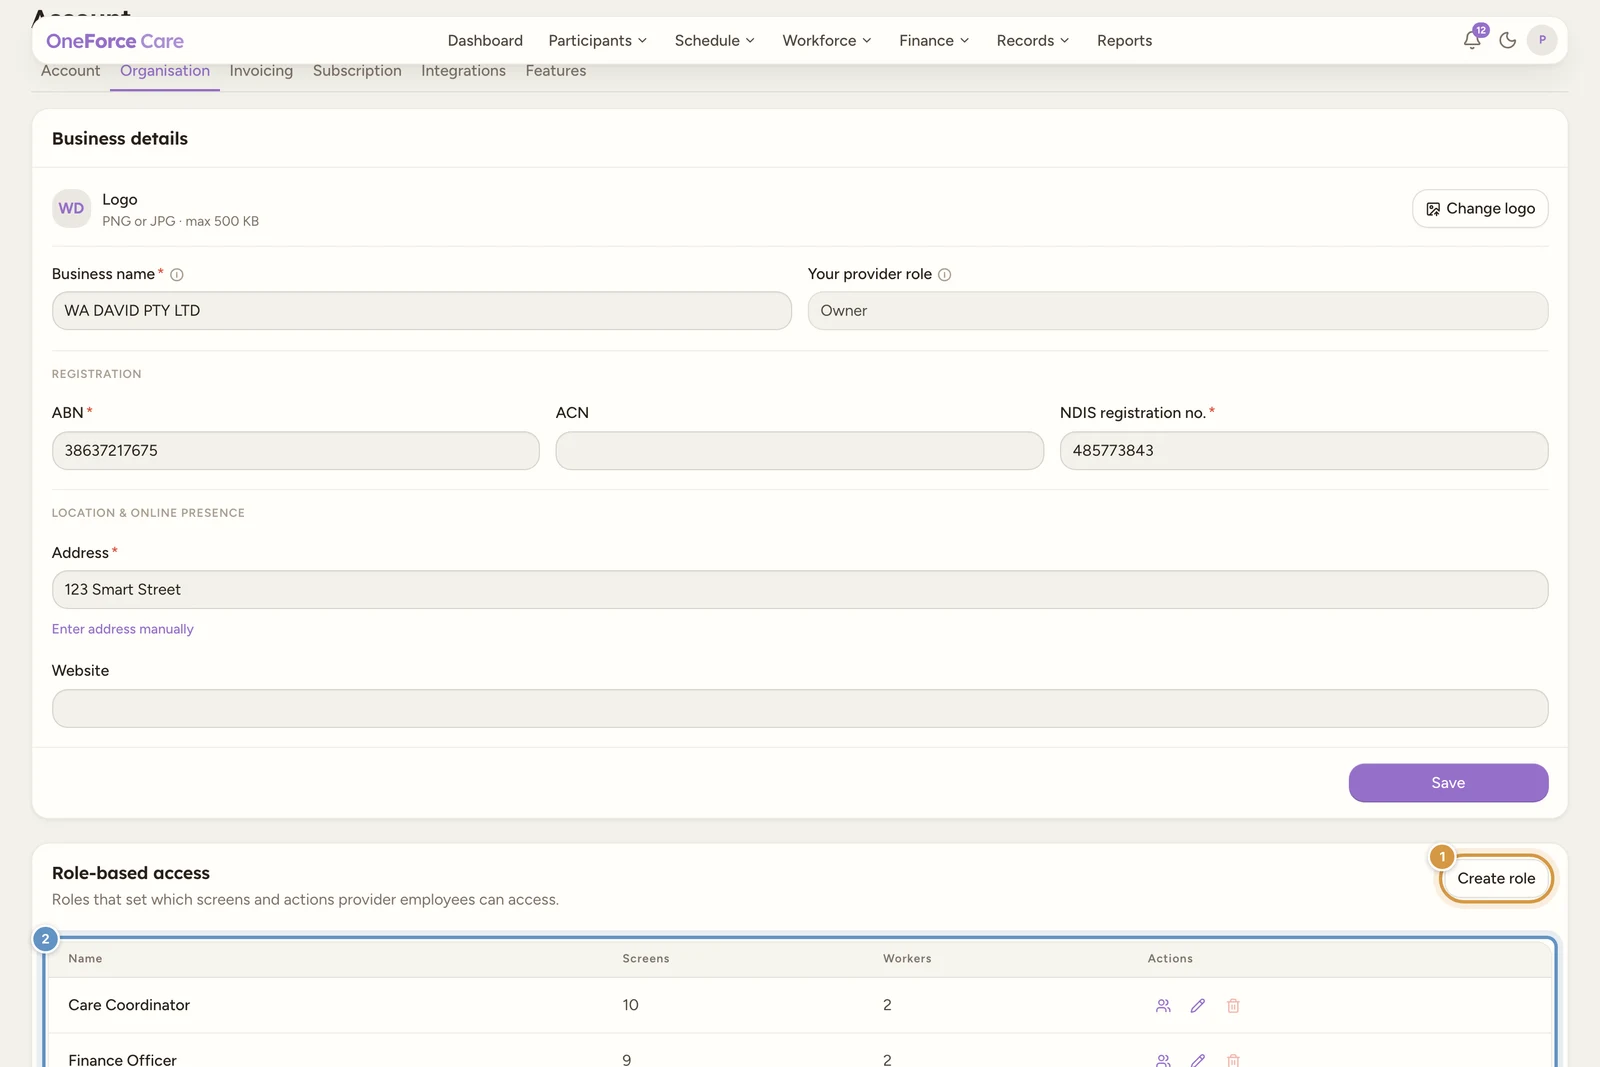
Create a role
Select Create role. In the drawer, type a Role name (required), then set permissions in the matrix. The columns are Screen, All, Read, Add, Edit and Delete.
| Action | What it lets the role do |
|---|---|
| All | Tick every supported action for that screen at once. |
| Read | Open and view the screen. |
| Add | Create new records on the screen. |
| Edit | Change existing records. |
| Delete | Remove records. |
The screens are Dashboard, Participants, Workers, Scheduling, Tasks, Incidents, Intake, Directory, Documents, Payroll, Invoicing, Payments, Reports and Settings. Some only support certain actions (Dashboard is read only; Reports is read and add; Settings is read and edit), and unsupported actions show a dash.
Note
Ticking any action turns Read on automatically, because a role cannot act on a screen it cannot see. Clearing Read clears the rest.
Save the role
Select Create role at the foot of the drawer. You see Role created. Editing a role later uses the Edit (pencil) action on its row and a Save changes button, with the toast Role updated.
Assign people to the role
On the role’s row, select View people (the people icon) to open Role members. In the Add worker box, search and pick one or more provider employees; each becomes a chip. Select the + button to add all of them at once. The list only offers provider employees who are not already on a role.
You see Name added to Role. for one person, or N people added to Role. for several. If you selected several and only some went through, you see Added X of Y people to Role. plus the reason, and the ones that failed stay in the box so you can try again.
To take someone off, select Remove from role on their row, then confirm Remove. You see Name removed from Role.
Delete a role
On the role’s row, select Delete (the trash icon), then Delete role to confirm. You see Role deleted.
Watch out
You cannot delete a role while workers are assigned to it. The Delete action is disabled and shows how many workers are assigned. Reassign or remove those people first, then delete the role.