Browse help topics
Scheduled reports
Pick a report, a cadence and who receives it, and it is emailed automatically.
Last updated · 2 August 2026
A scheduled report runs itself and emails the result to the people you name, so the weekly roster-health check or the fortnightly claiming summary lands in an inbox instead of waiting for someone to remember. Everything you can run on Insights or build on Data export can be scheduled.
The Scheduled tab
Go to Reports and select the Scheduled tab.
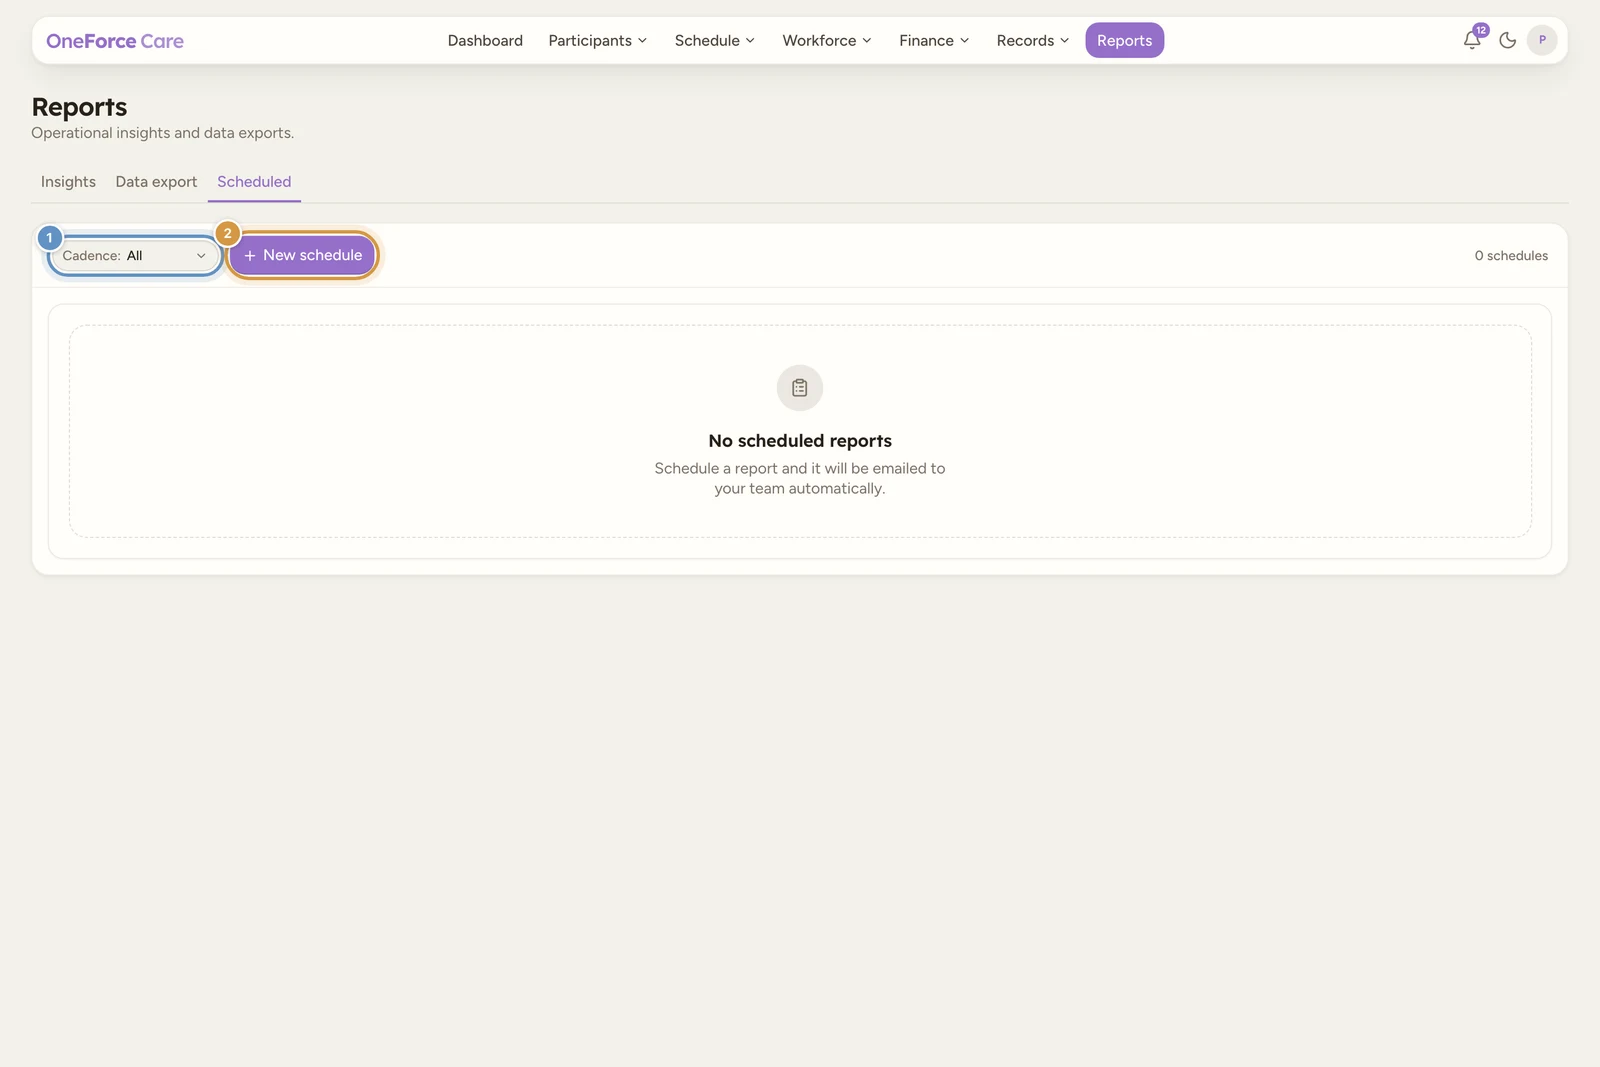
A workspace with nothing scheduled yet: 'No scheduled reports' / 'Schedule a report and it will be emailed to your team automatically.'
Once you have schedules, the table lists them with these columns:
| Column | What it shows |
|---|---|
| Report | The report’s name, with Insight or Data export underneath. |
| Cadence | A plain-language summary: “Weekly on Monday”, “Every second Monday” or “Monthly on the 1st”. |
| Recipients | The first address, and “and N more” when there are others. |
| Last sent | The date of the last send, or Never. |
| Status | Sent, Failed, or Not sent yet while the schedule has never run. |
Each row has a pencil to edit and a bin to delete. Deleting asks first, and warns that the report stops being emailed while reports already sent are unaffected.
Create a schedule
Open the drawer
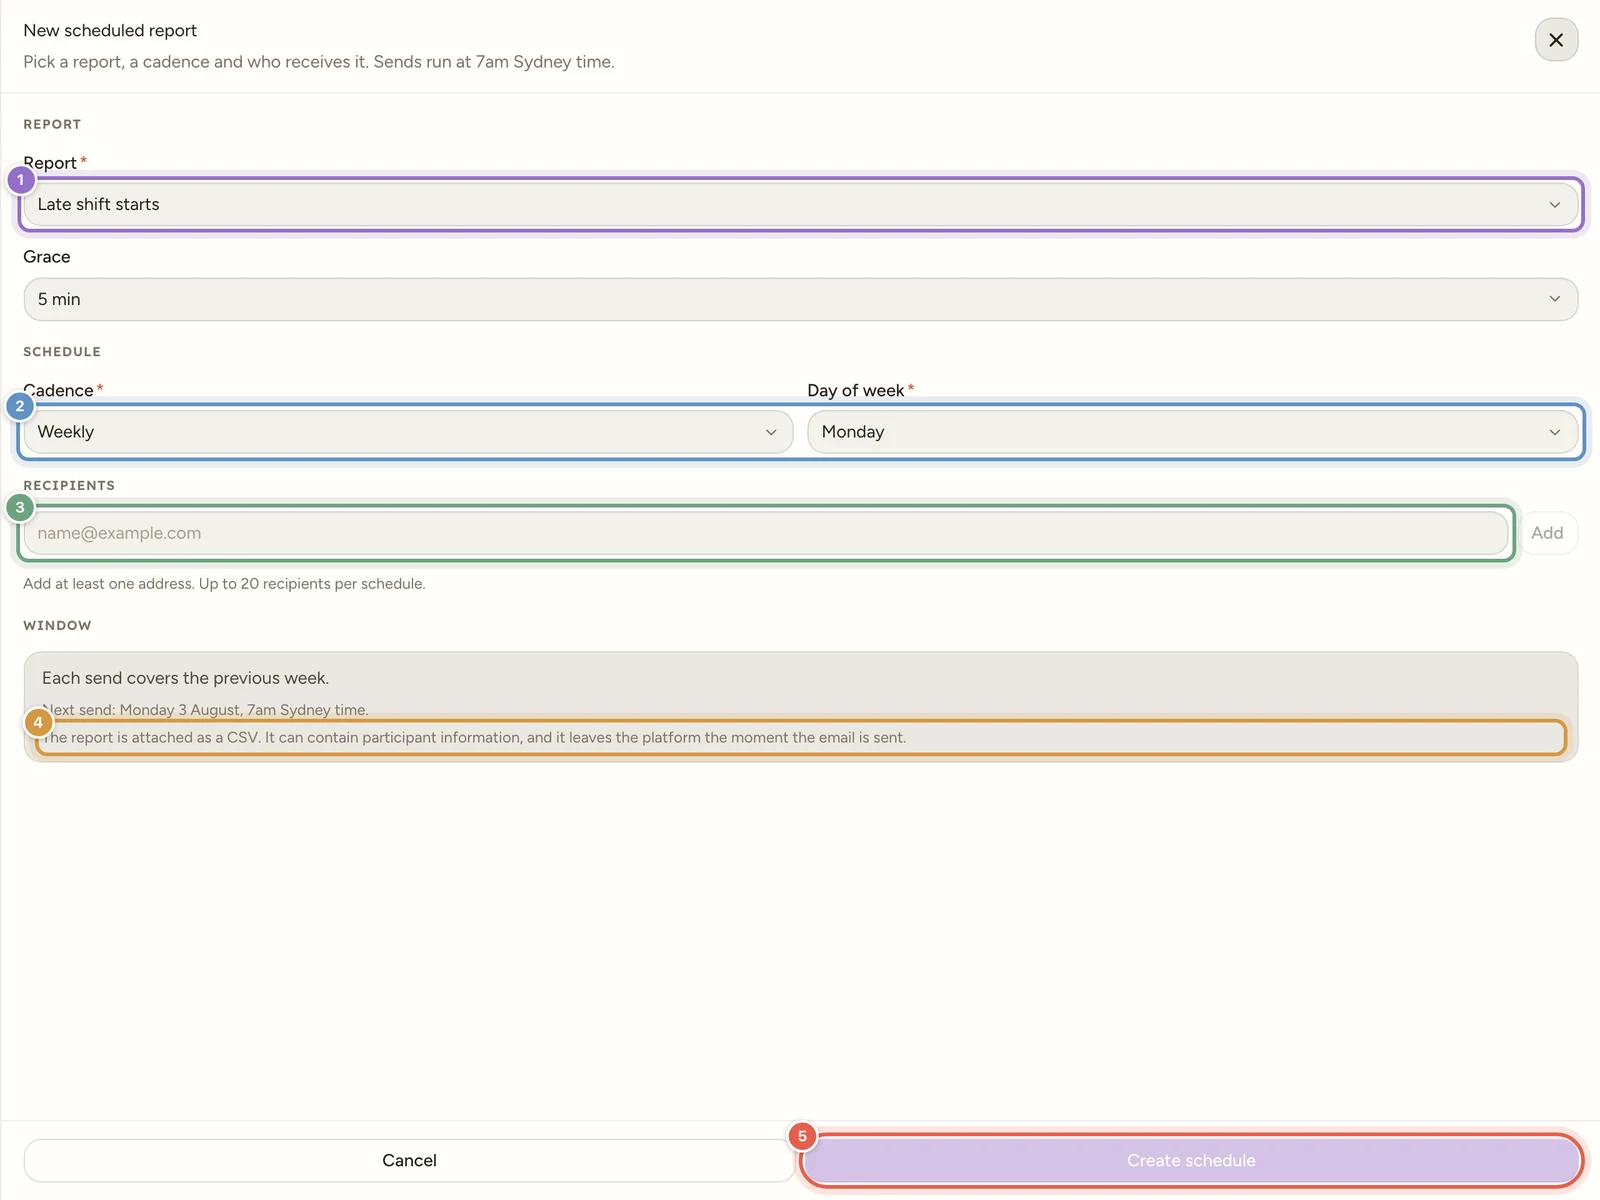
Select New schedule. The drawer is titled New scheduled report, with “Pick a report, a cadence and who receives it. Sends run at 7am Sydney time.”
Pick the report
The Report picker groups every pre-built insight by its category, then every export dataset under a “{Area} export” heading. Choosing an insight that takes a parameter (for example Grace on Late shift starts) adds that control underneath, set to the same default the Insights tab uses.
Set the cadence
Cadence is Weekly, Fortnightly or Monthly. Weekly and fortnightly then ask for a Day of week; monthly asks for a Day of month, from the 1st to the 28th only, so a send can never skip February.
Switching cadence resets the day, because a day of the week and a day of the month are different scales.
Add the recipients
Type an email address and select Add, or press Enter. Each one becomes a chip you can remove. Up to 20 recipients per schedule, and duplicates and malformed addresses are refused as you add them. Create schedule stays greyed out until there is at least one.
Check the window, then save
The Window panel is read-only and tells you three things:
- What each send covers: “Each send covers the previous week”, “…the previous fortnight” or “…the previous month”.
- Next send, as a date, at 7am Sydney time.
- The privacy note: “The report is attached as a CSV. It can contain participant information, and it leaves the platform the moment the email is sent.”
Select Create schedule. To change one later, open it from the table and the same drawer reopens as Edit scheduled report with Save changes at the foot.
Watch out
A scheduled report leaves the platform as an email attachment. Only add recipients who are entitled to see the participant and worker information the report contains, and prefer a work address over a personal one. Review your schedules when someone leaves your team.
Note
Sends run once a day at 7am Australia/Sydney time, and every window is measured in that timezone, so a fortnightly report always covers a full fourteen days no matter where your team reads it.
Tip
Not sure which report to schedule? Run it by hand first on Insights or Data export, check the columns are the ones you want, then schedule the same one.